In the good ol’ days, one would usually sift through these files manually to free up space. Not anymore. The Windows 10 Creators Update came with a new feature which keeps an eye on the disk space and clears it automatically. Going by the name of Storage sense, this feature was further improved in the Windows 10 Fall Creators update.
How Does Storage Sense Work?
Storage sense monitors your system for old and unused files and actively removes them on a regular schedule. For example, if you have files lying in your Recycle Bin for more than 30 days you won’t have to delete them manually, this feature will help take care of it. Interestingly, if you have a previous installation of Windows on your system, you can also opt to have it removed. Now that we know what Storage sense is, let’s see how to enable it.
How to Enable & Customize Storage Sense
Step 1: Head over to Settings > System and click on Storage. Alternately, you can hit Windows key+Q for Cortana and type Storage. Step 2: Once in, turn on the switch for Storage sense. By default, this feature only takes care of temporary files and old files in the Recycle Bin. Step 3: To opt for the option to clean up the Downloads folder, click on the Change how we free up space link. This will take you to the Configurations page. Now, all you have to do is check the third option and you’re sorted. From now on the system will automatically keep the junk pile-up process in check.
Cleaning up Old Windows Installation Files
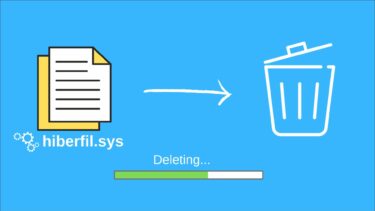
As you already may know, Windows automatically saves data from older versions of Windows, once your PC has upgraded. This is essentially done so that you can revert to the old version should the need arise. However, it may surprise you to know that this data can run into several GBs. After the last update, my PC had 1.6GBs of temporary files. A quick and easy way to clean them up is through the Clean now button. Check on the checkbox besides the Delete previous versions of Windows option and click the button.
Bonus Tips: Clean up Space on Your Windows 10 PC
As we mentioned above, Storage sense is only suited for junk files. But, if you’re looking for more tricks related to storage, we have got you covered. The following nifty trick will help you have the perfect balance of space and usability.
1. Kick Out Unused Apps
Similar to phones, PCs also have a number of apps that are seldom used. The human nature is such that we tend to forget about apps and they just lie there eating up the much-coveted disk space. All you have to do is go to the Apps & features page and uninstall the apps which you don’t need.
2. Manage Space Cleverly
Most of us usually save our files and folders to a default folder. In my case, whatever file it is, be it a doc, audio file or a video file, they all get saved to the C: drive. You can very well understand the condition of the drive in a few months time. Thankfully, you can change the drive for each file type. Navigate to Settings > Storage and click on the Change where new content is saved link. Now, all you need to do is change the location for the file types and hit Apply.
All Set For Spring Cleaning?
So, this was how you can intelligently clean up junk on Windows 10 PCs to reclaim storage space. The best thing about this process is that it’s easy and hardly takes a minute to set up. The above article may contain affiliate links which help support Guiding Tech. However, it does not affect our editorial integrity. The content remains unbiased and authentic.