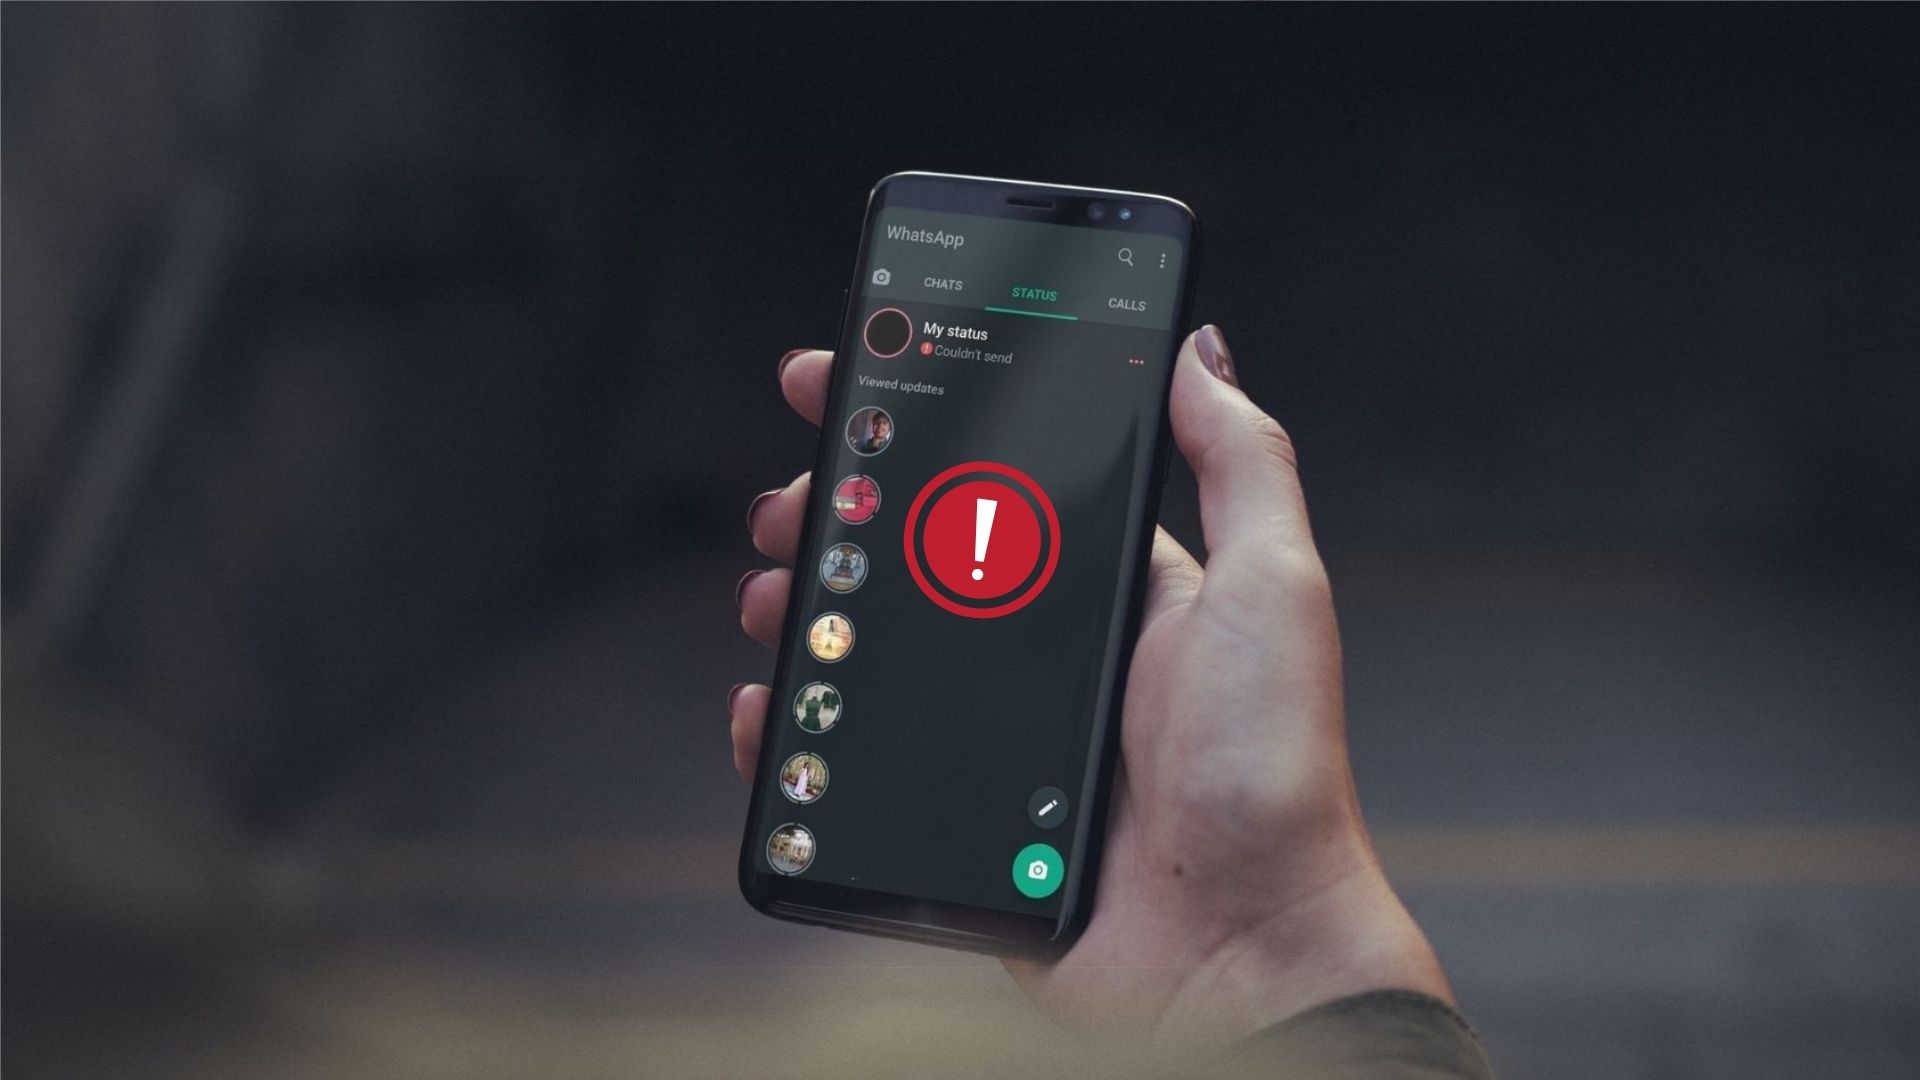
If you’re certain that your internet connection is fine and restarted the app a few times, employ the seven troubleshooting tips in this post to fix the WhatsApp Status not uploading issue.
1. Try Another Image or Video
First, try uploading another image or video. That’ll verify whether the issue is related to the particular image or video. You can also try posting a written status update instead to see if that works.
2. Check File Format
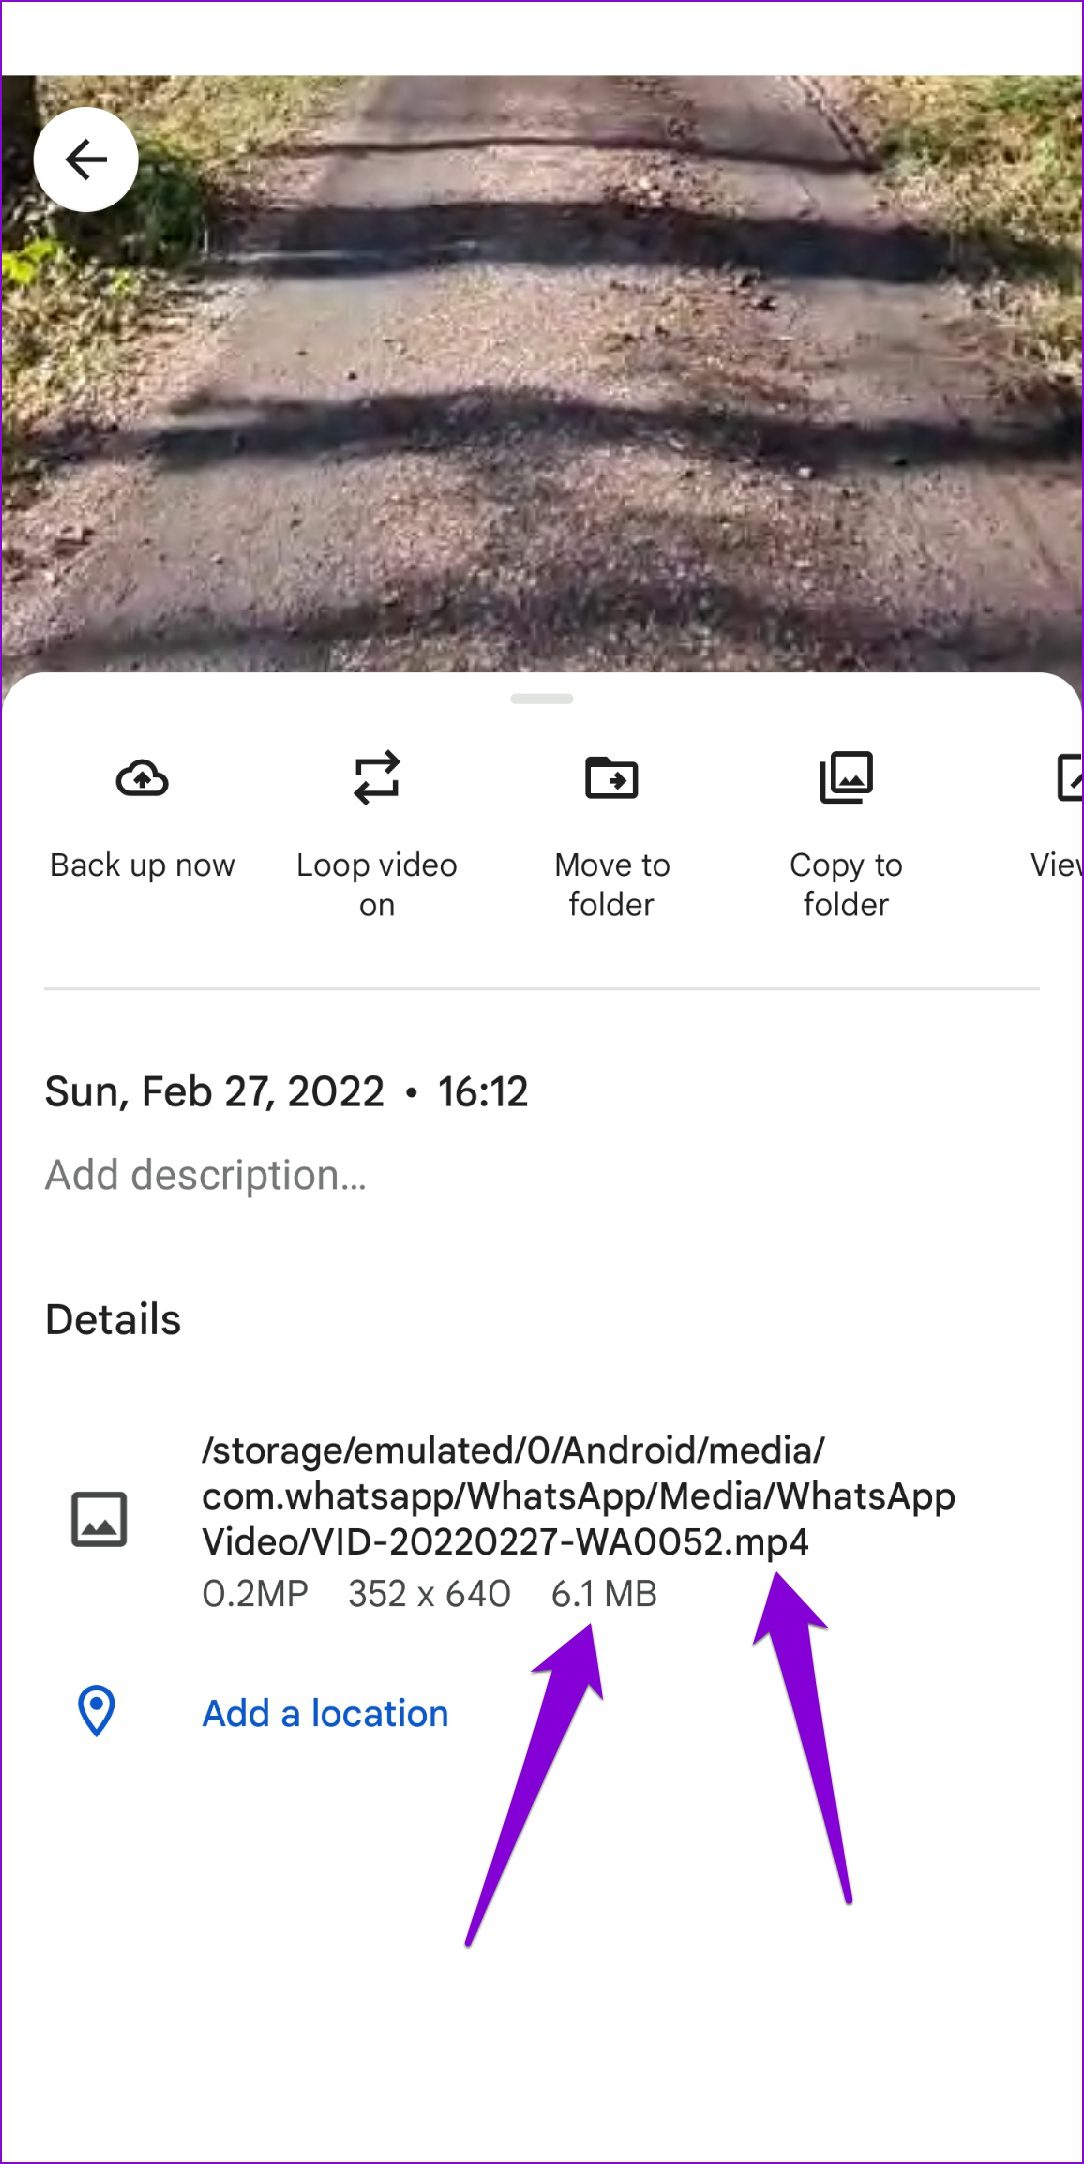
WhatsApp supports the most popular file formats. If the image or video you’re trying to share is in an unsupported format or if it’s too large, you might get a ‘Couldn’t Send’ error while uploading it to your WhatsApp status. Mostly happens with video files. If the video you’re trying to upload is in an unsupported format, you’ll have to convert it into one of the supported formats (such as MP4, MKV, MOV, etc.) and try uploading it again. To check the format of a video on Android, open it in the Google Photos app and swipe up to view the video’s format and size.
Similarly, open up your video in the Photos app if you’re using an iPhone. Tap on the info button at the bottom and check the video size and format.
3. Check App Permissions
Next, you’ll need to ensure that WhatsApp isn’t restricted. For instance, if you’ve denied WhatsApp from using mobile data in the background or restricted its battery usage, your phone will suspend the uploading process once you minimize the app. Here’s how to change that.
Android
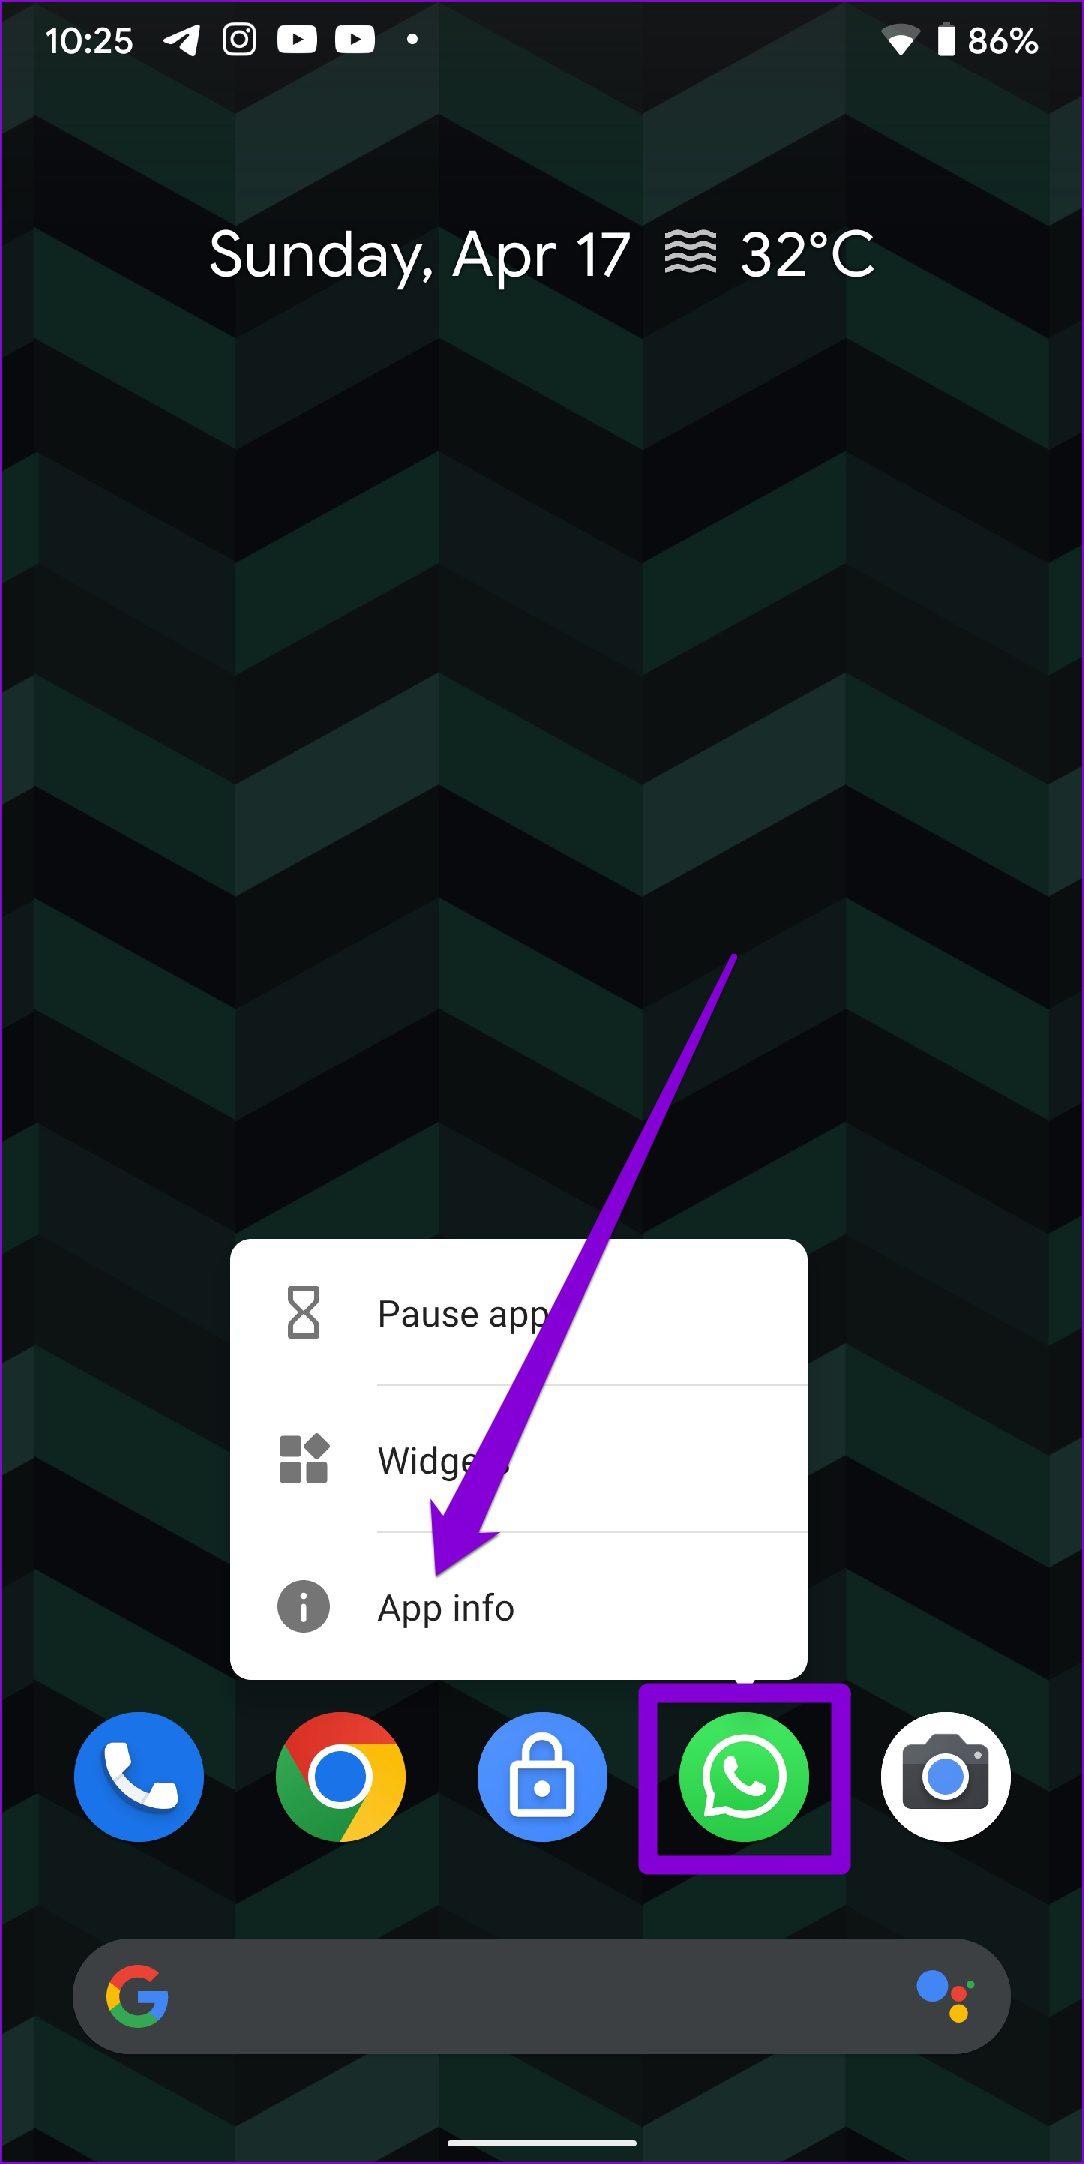
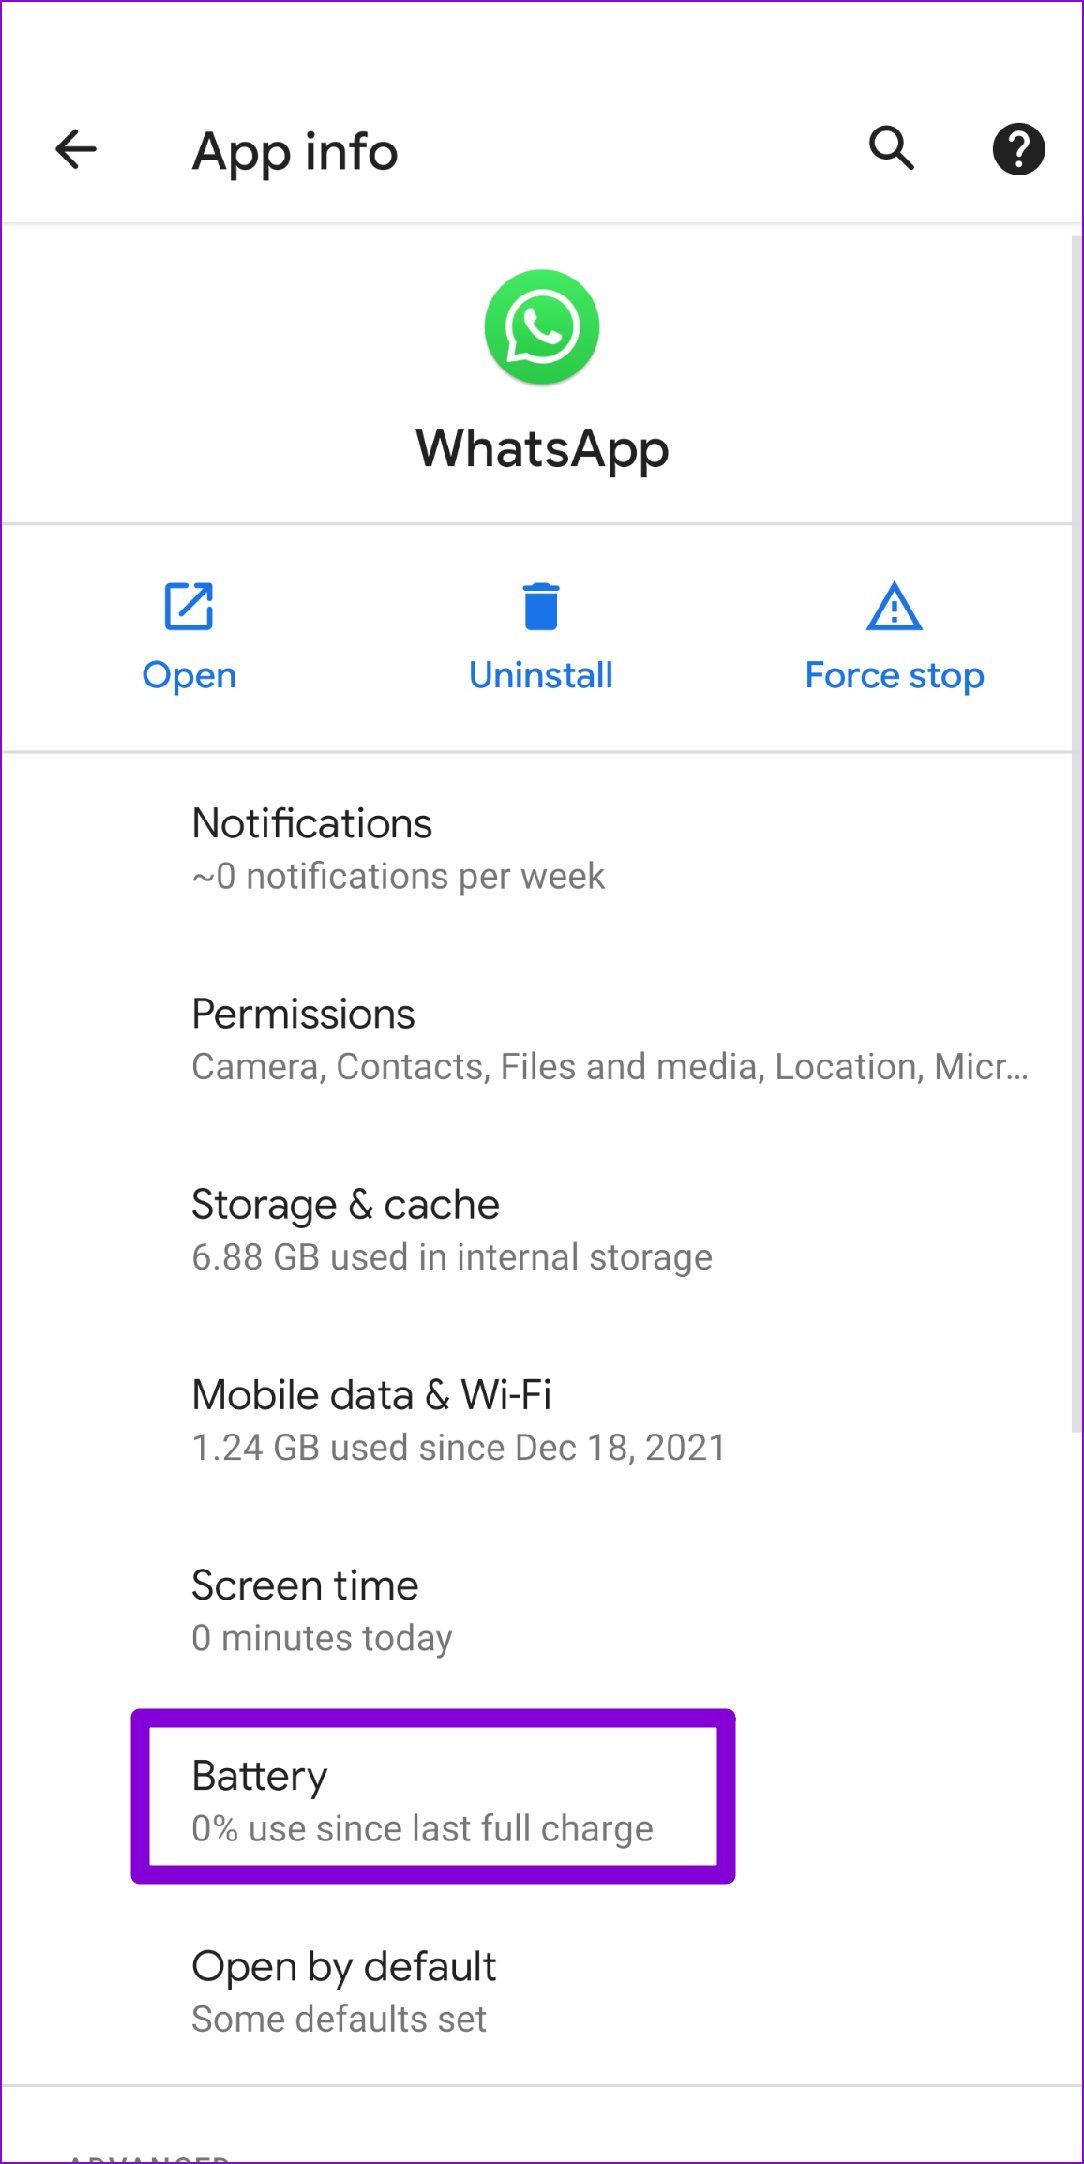
Step 1: Long-press on the WhatsApp icon and select App info from the menu that appears.
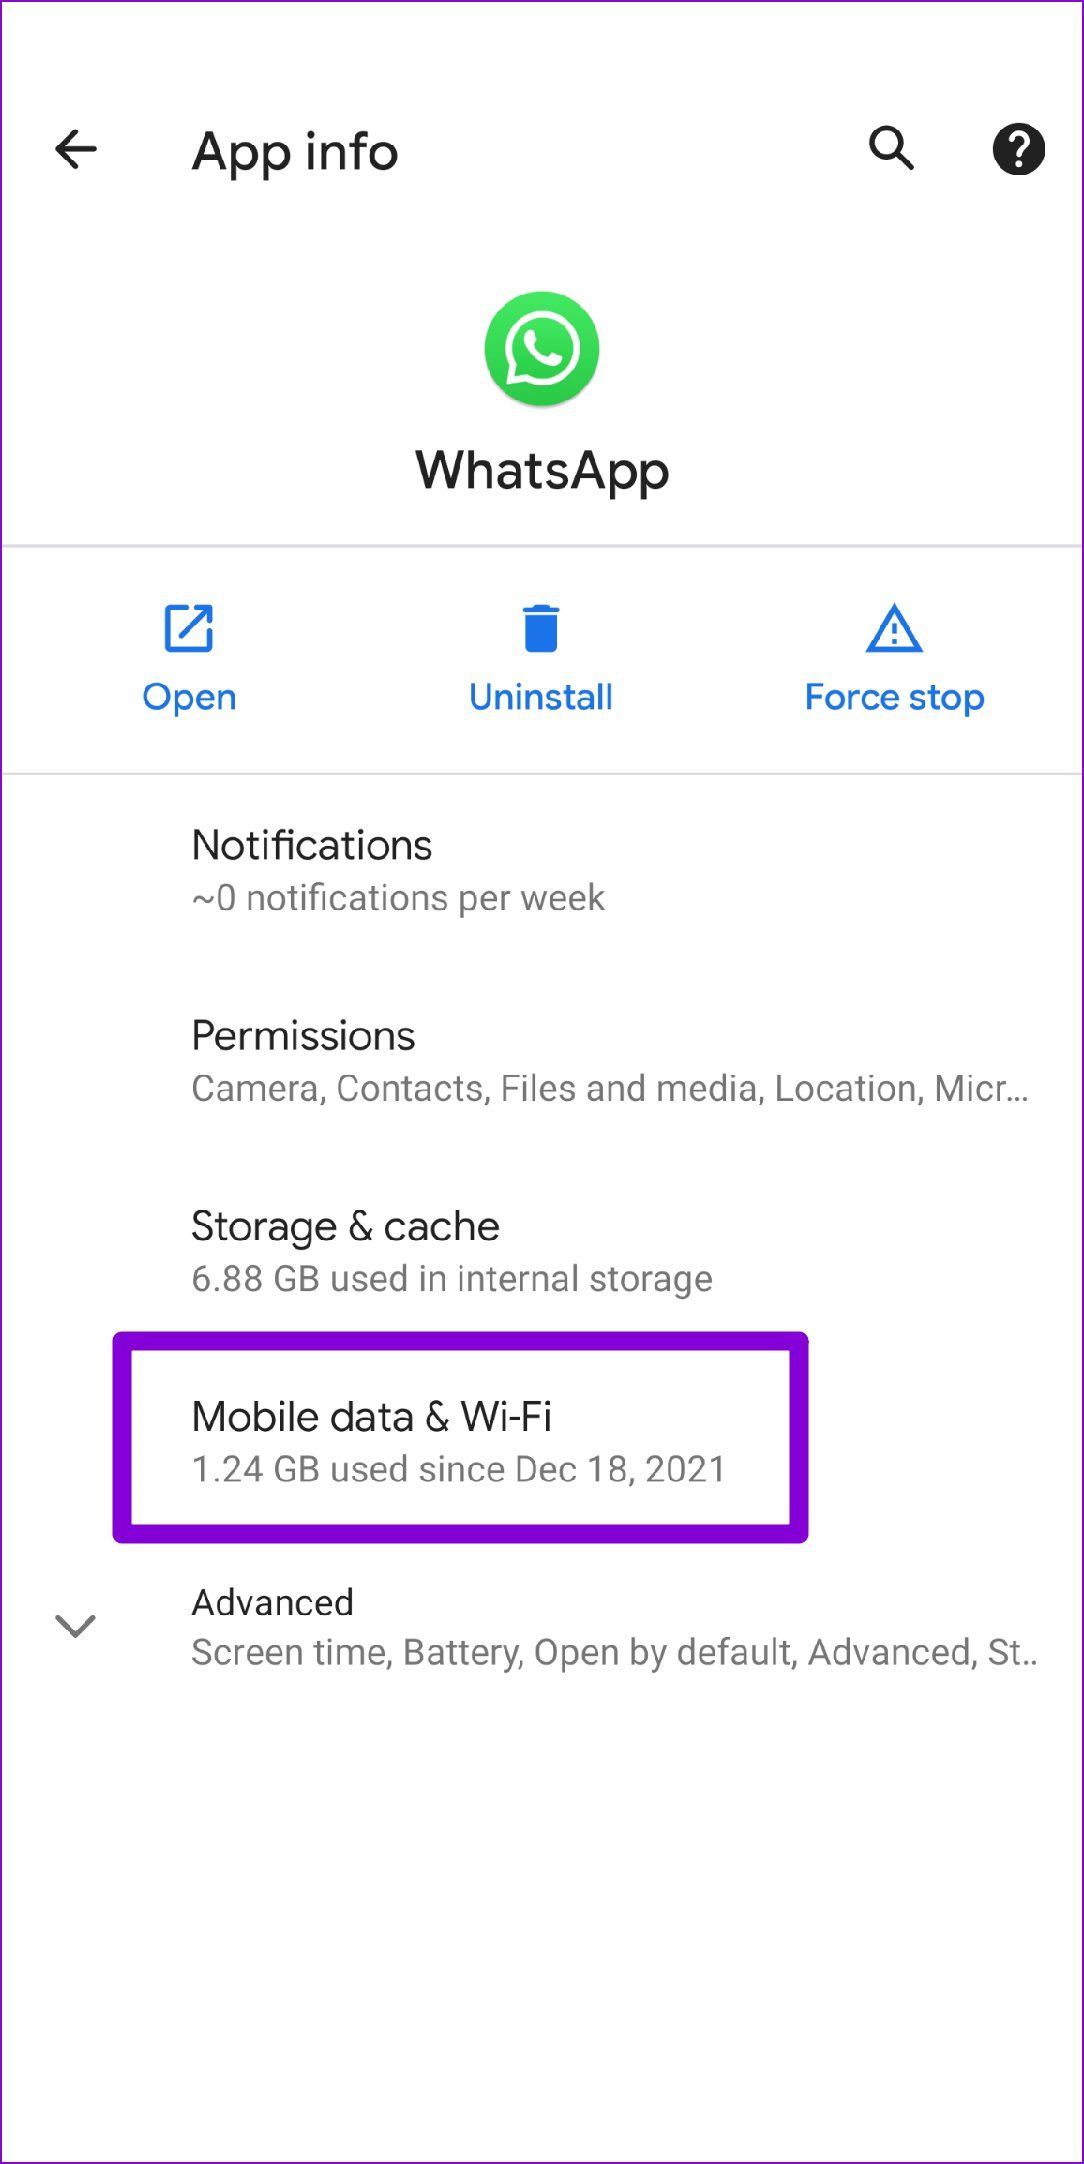
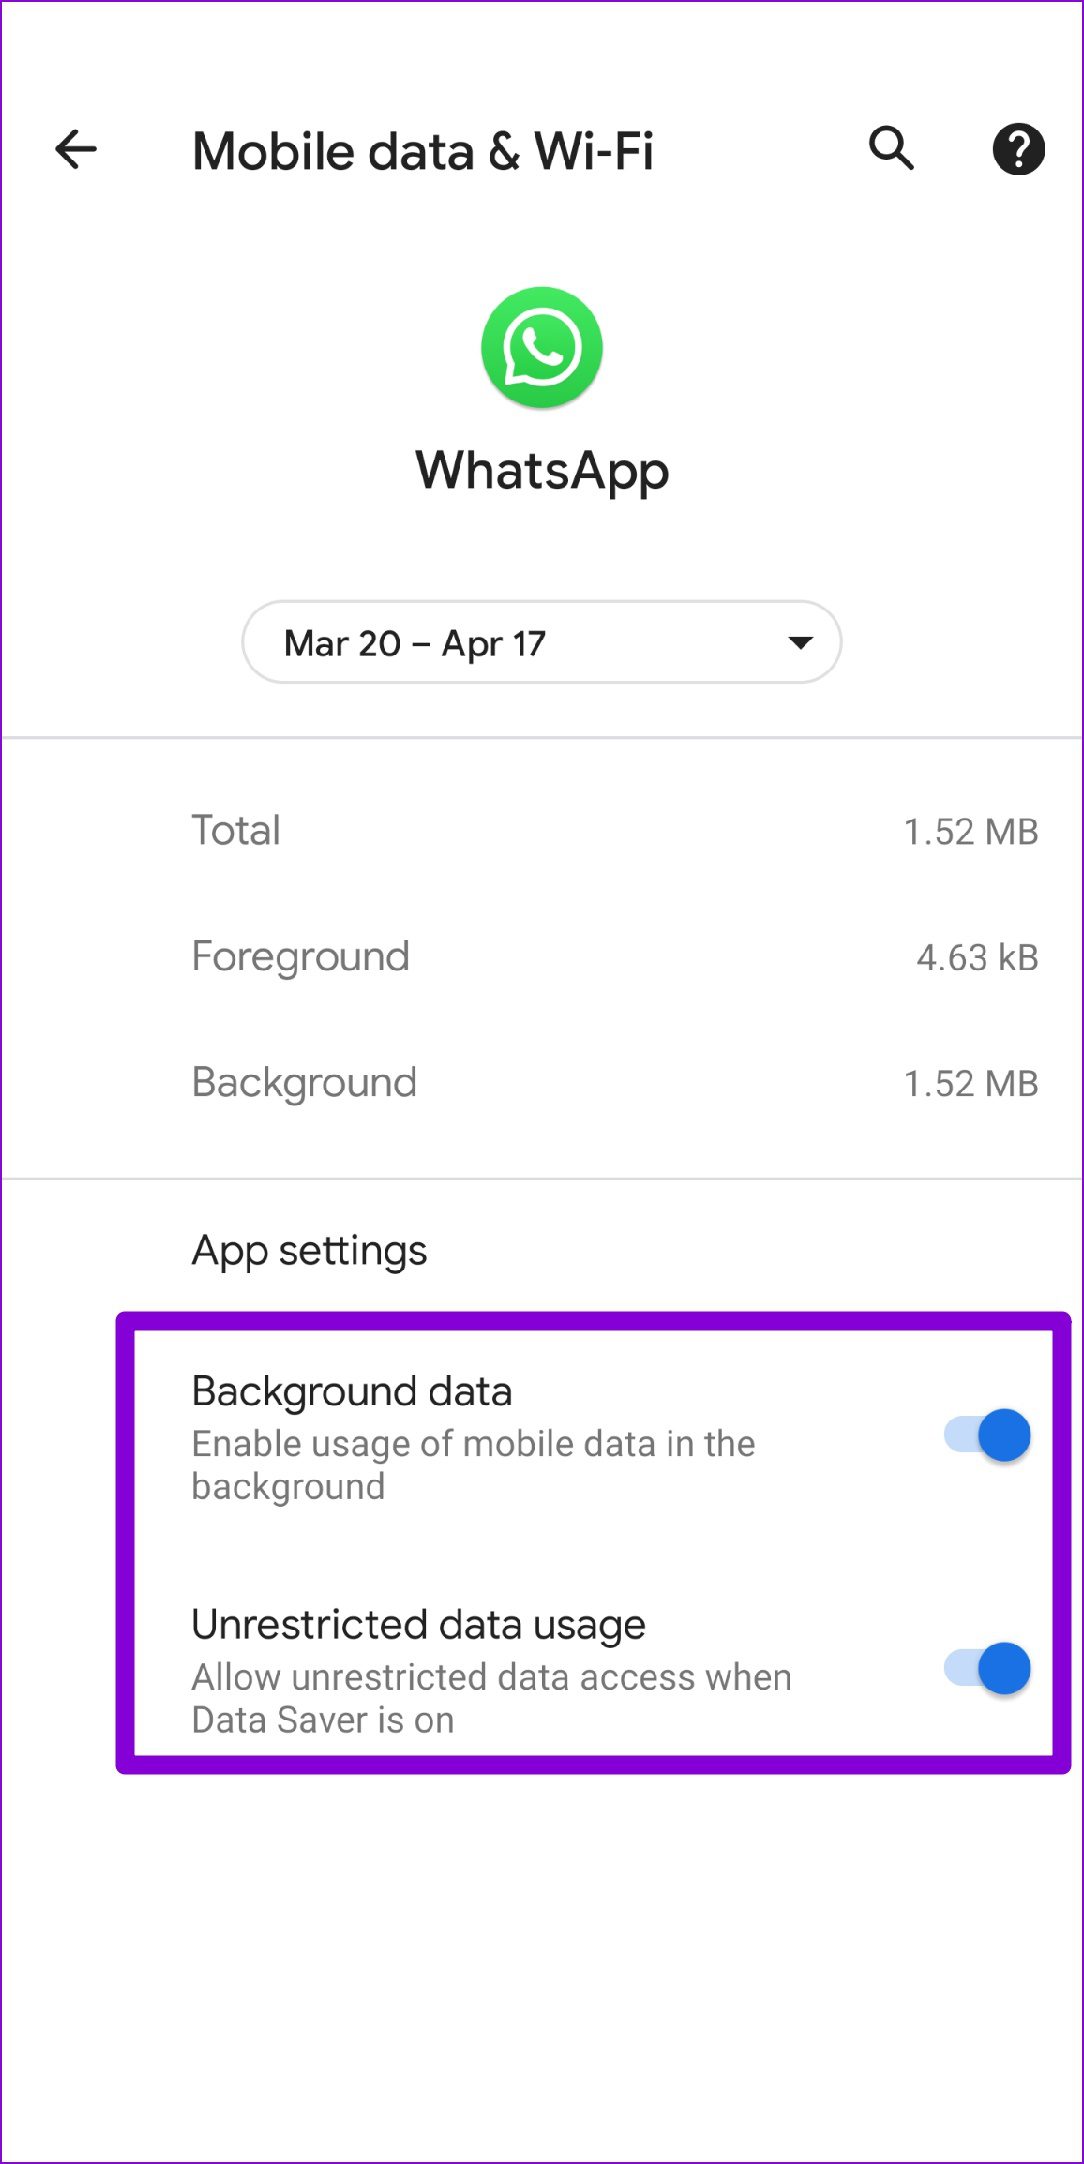
Step 2: Go to Mobile Data & Wi-Fi. Toggle on the switches next to Background data and Unrestricted data usage.
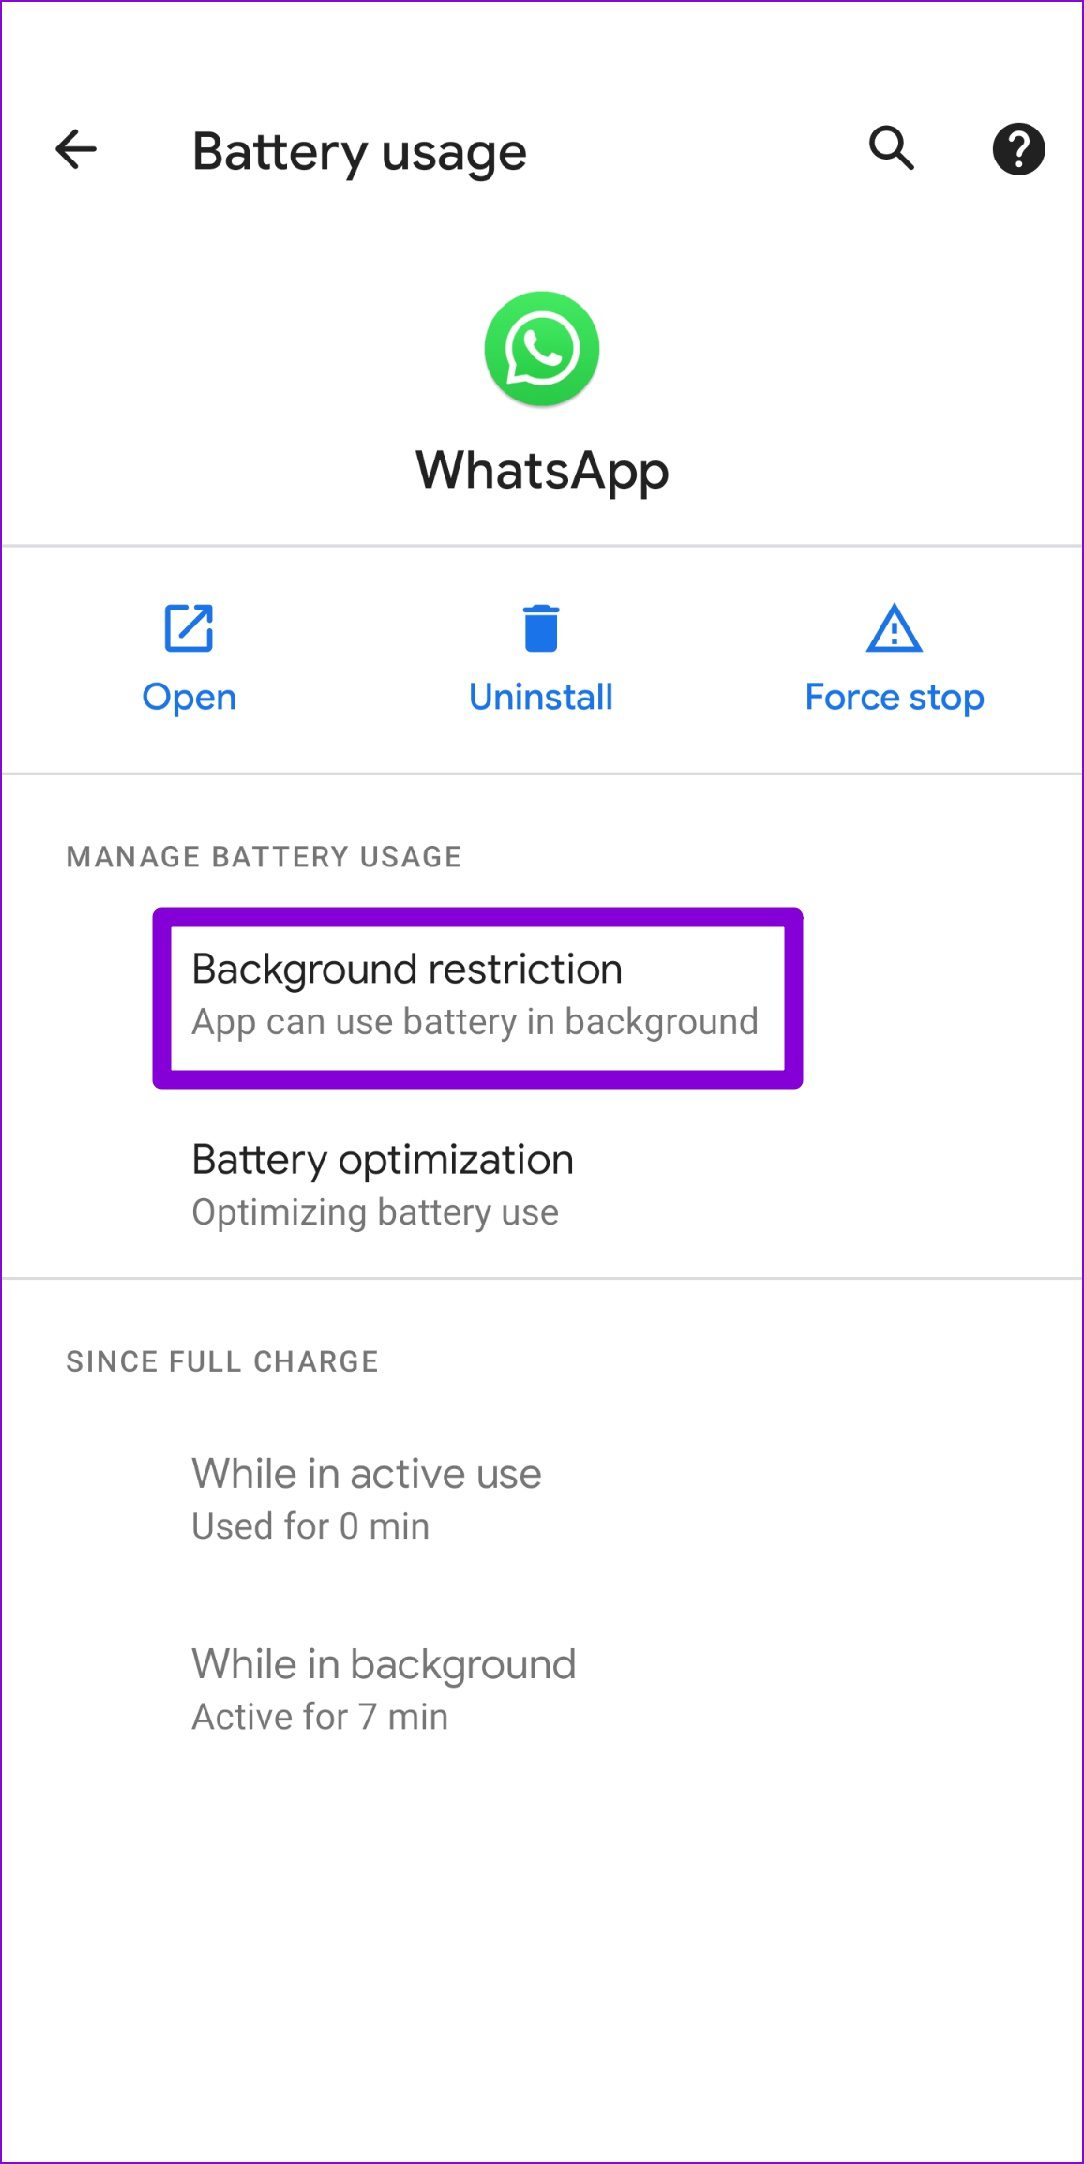
Step 3: Return to the app info page, tap on Battery and remove any restrictions.
iPhone
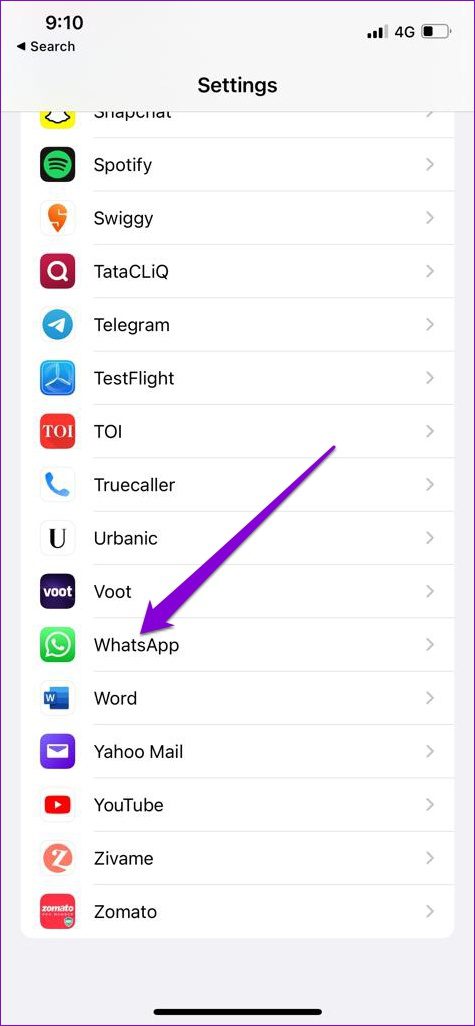
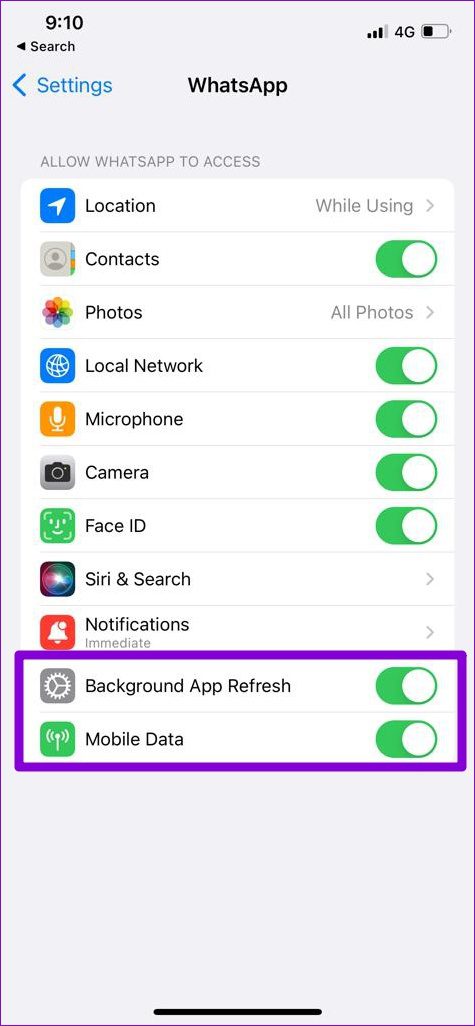
Step 1: Open Settings on iPhone and scroll down to tap on WhatsApp.
Step 2: Ensure that the switch next to Mobile Data and Background App Refresh is enabled.
4. Set Correct Date and Time on Your Phone
WhatsApp relies on the date and time on your phone to connect and sync data with its server. Therefore, if your phone is set to an incorrect date or time, WhatsApp might fail to connect with its server and throw a ‘Couldn’t send’ error. Rather than changing it manually, you should configure your phone to use network-provided time. Here’s how.
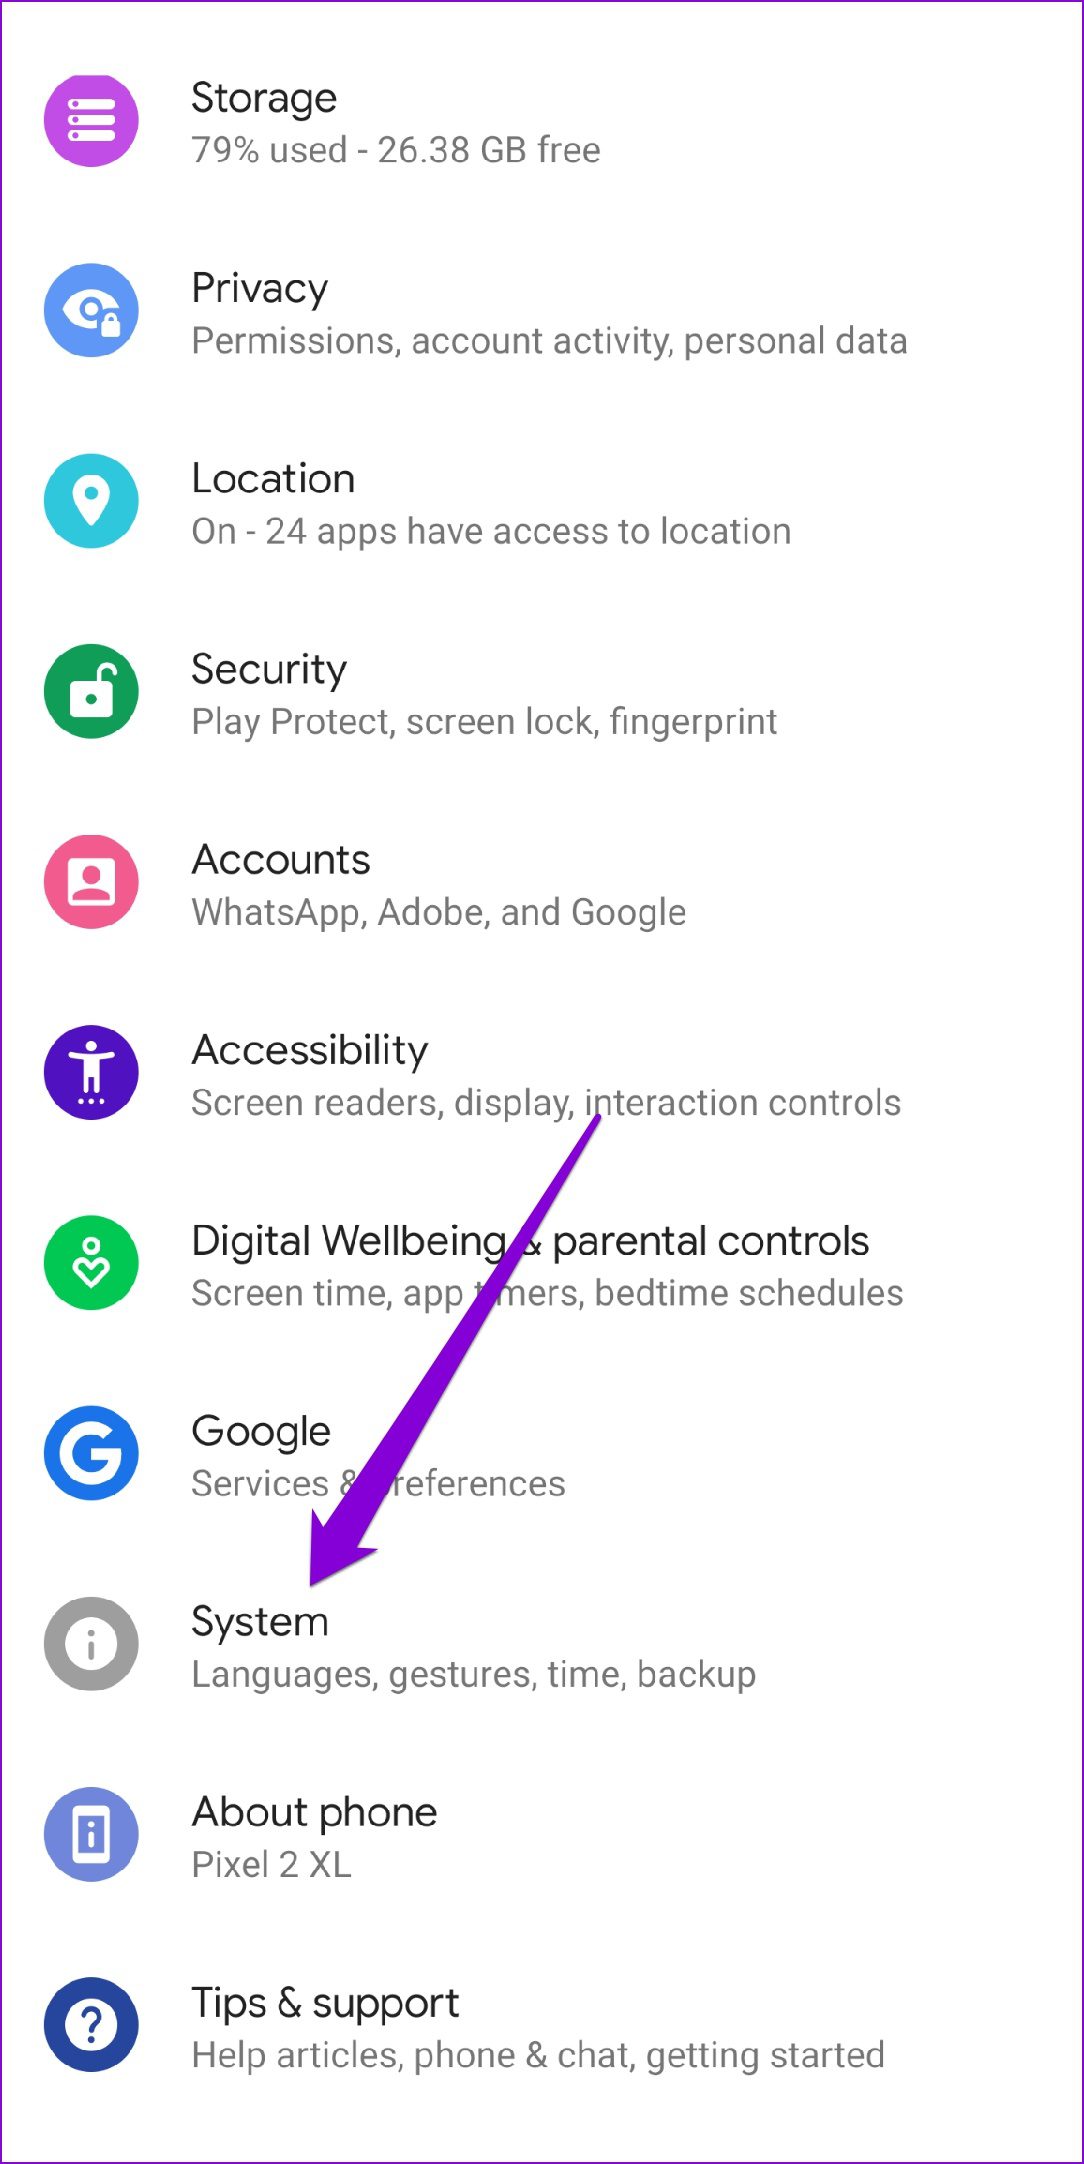
Android
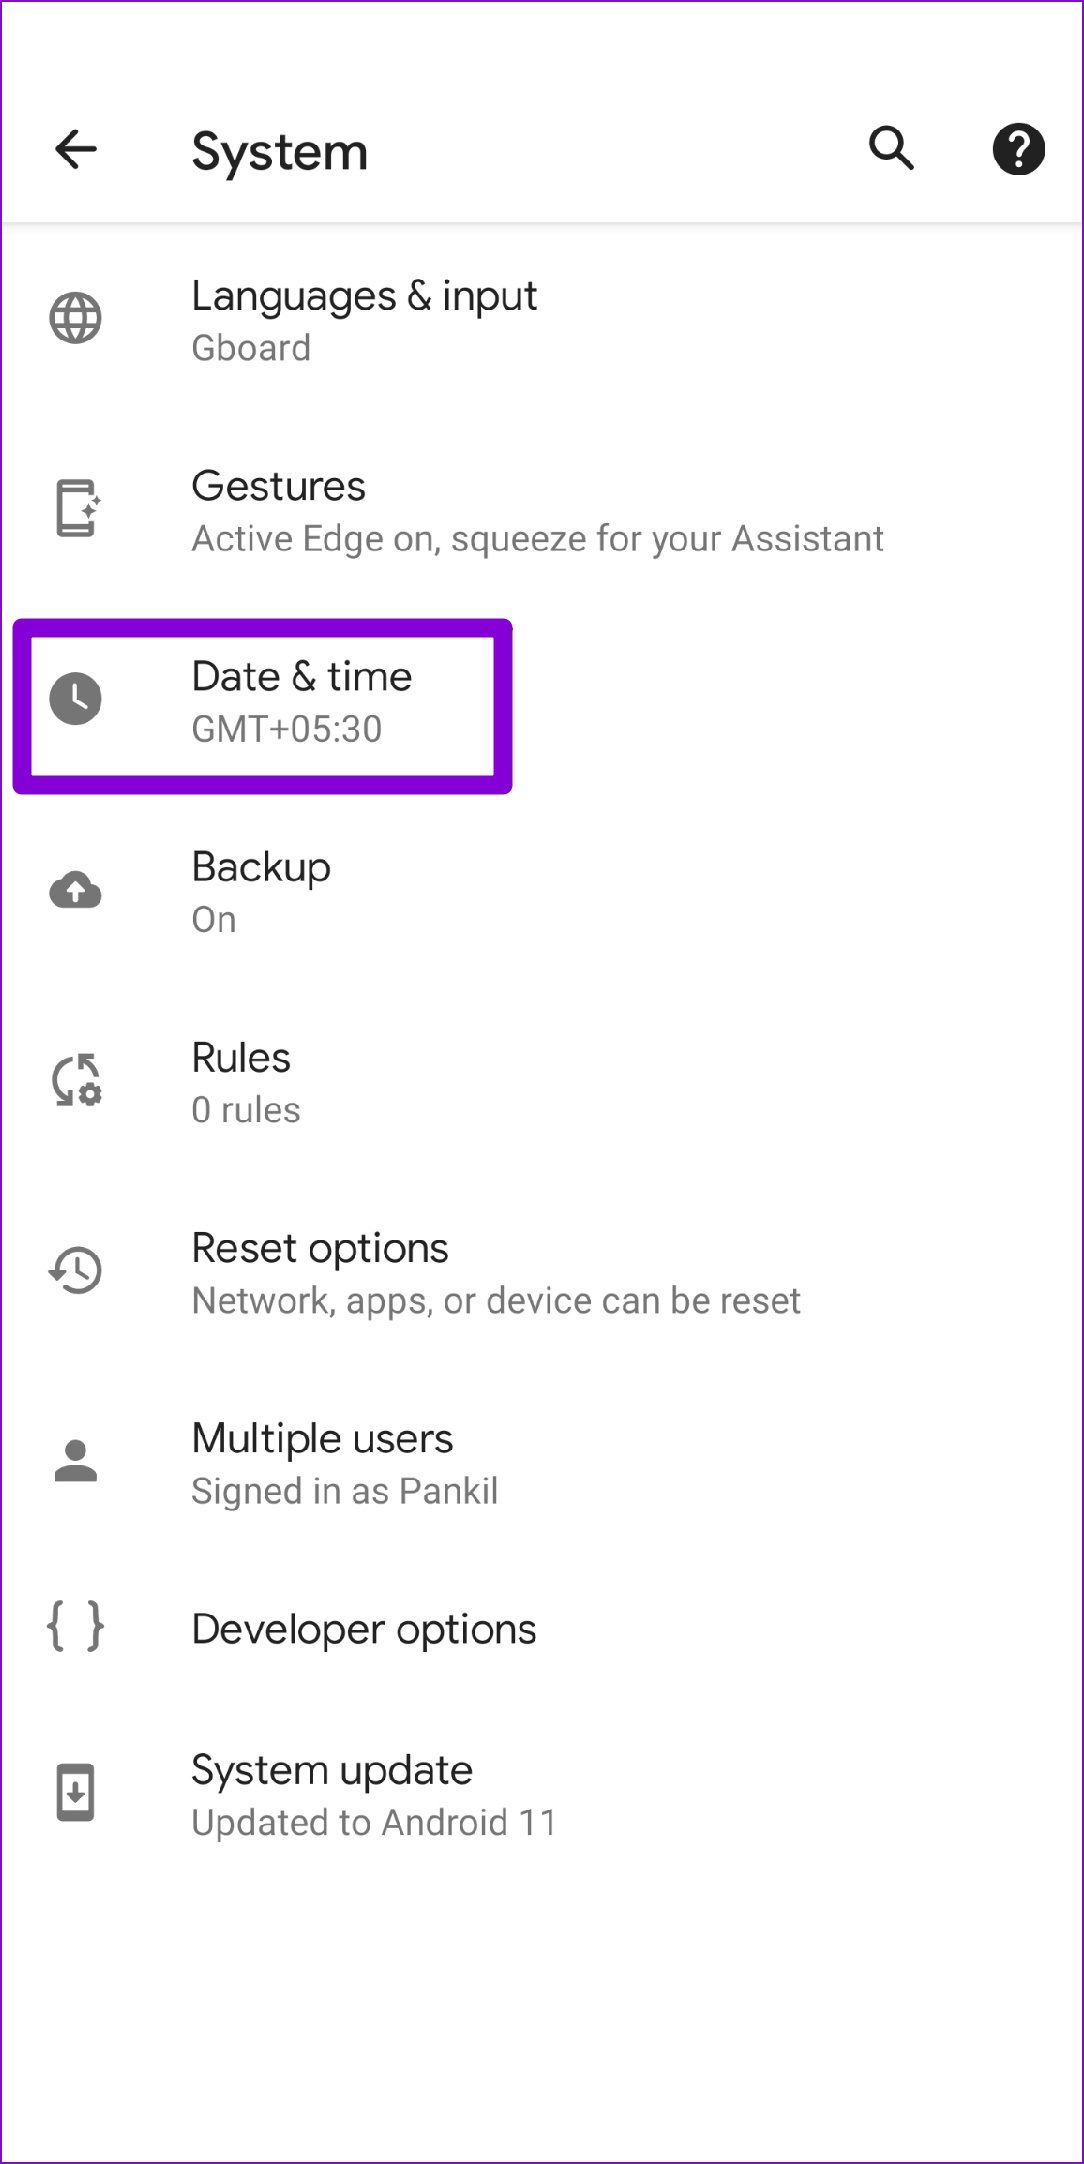
Step 1: Open the Settings app on your Android and navigate to System.
Step 2: Tap on the Date and time option and toggle on the switches next to ‘Use network-provided time’ and ‘Use network-provided time zone.’
iPhone
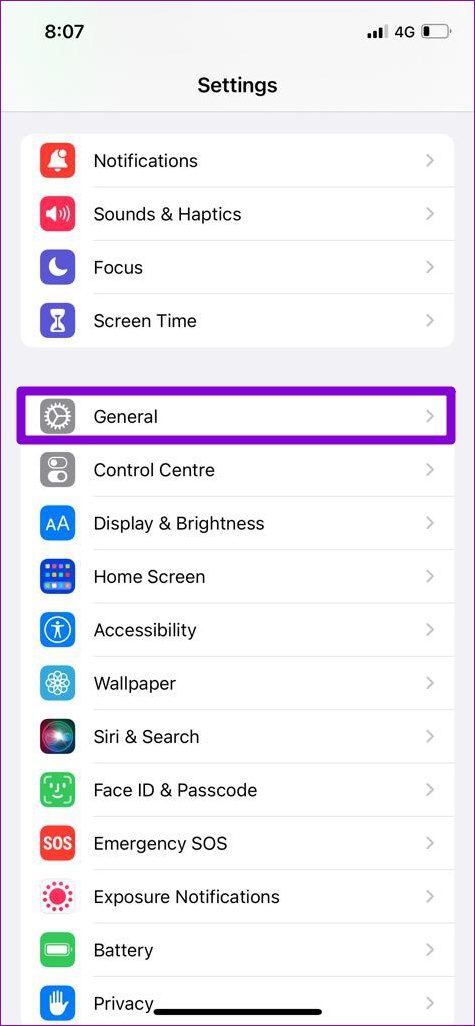
Step 1: Launch the Settings app on your iPhone and navigate to General.
Step 2: Tap on Date & Time. Toggle on the switch next to Set Automatically.
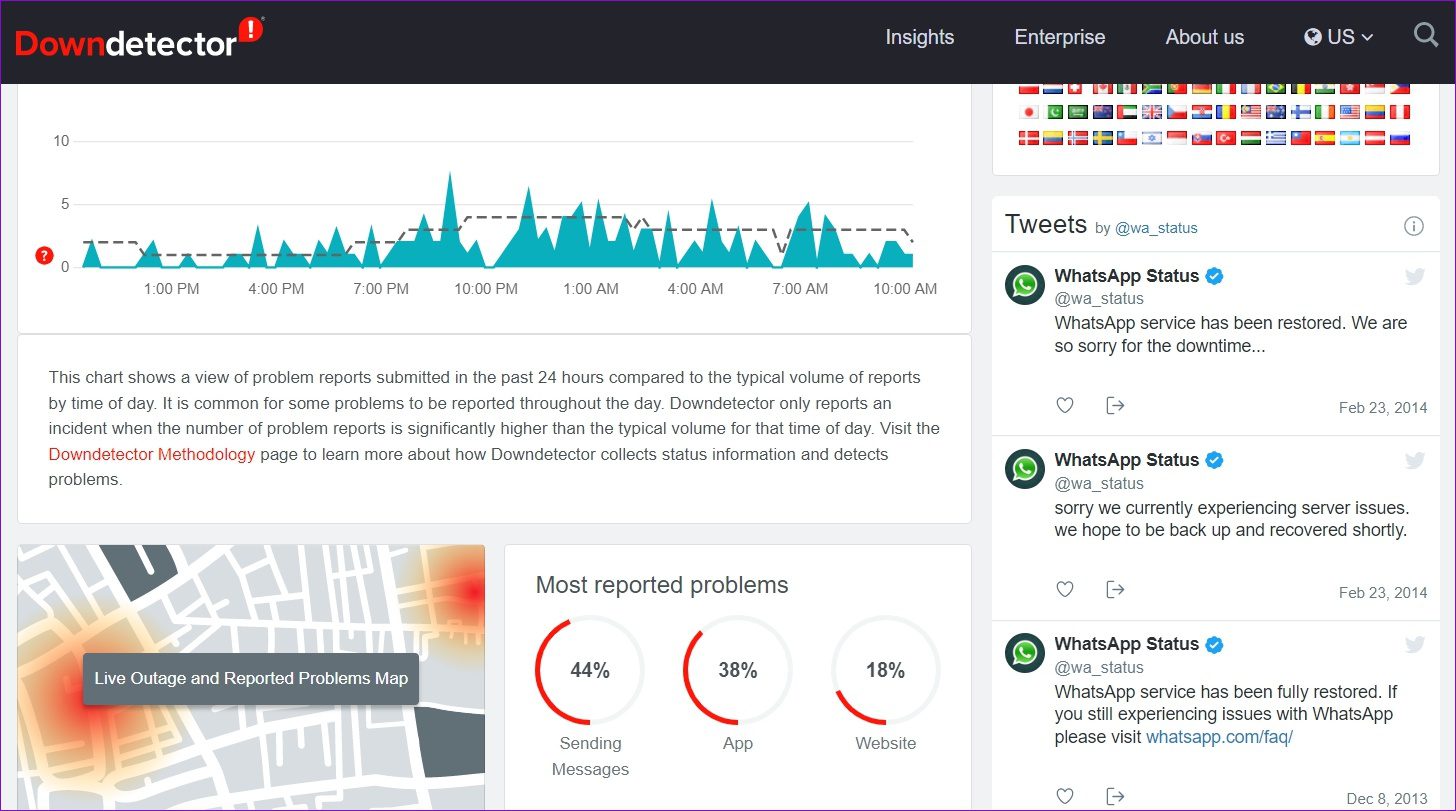
5. Check DownDetector
At times, issues with WhatsApp’s servers can also lead to the ‘Couldn’t send’ error. You can visit a website like Downdetector to see if others face similar issues.
If the servers are down, then you have no option but to wait for WhatsApp to get them up and running again.
6. Clear WhatsApp Cache (Android)
Another reason why WhatsApp may fail to function properly is if the existing cache data collected by the app has become too old and interferes with the app. To fix this, you’ll need to clear WhatsApp’s cache data by following the steps below. Step 1: Long-press on the WhatsApp icon and select App info from the menu that appears.
Step 2: Go to Storage & cache and tap on the Clear cache option.
After that, force-stop WhatsApp and try uploading the status again to see if it works.
7. Update WhatsApp
Lastly, you should try updating WhatsApp to its latest version to see if the recent update has resolved the issue you’re facing. Head to the App Store or Google Play Store and update WhatsApp to the latest version.
Update the Status
WhatsApp Status has become more popular since it’s an easier way to reach out to friends and others. Hopefully, the above tips have helped you fix any issue, and you’re back at sharing your favorite moments with friends and loved ones. The above article may contain affiliate links which help support Guiding Tech. However, it does not affect our editorial integrity. The content remains unbiased and authentic.