Such Bluetooth connectivity issues can be a major inconvenience. Before you settle for wired connections and clutter your desk, consider applying the following solutions to fix this annoying Bluetooth connection issue on Windows 11.
1. Toggle the Airplane Mode
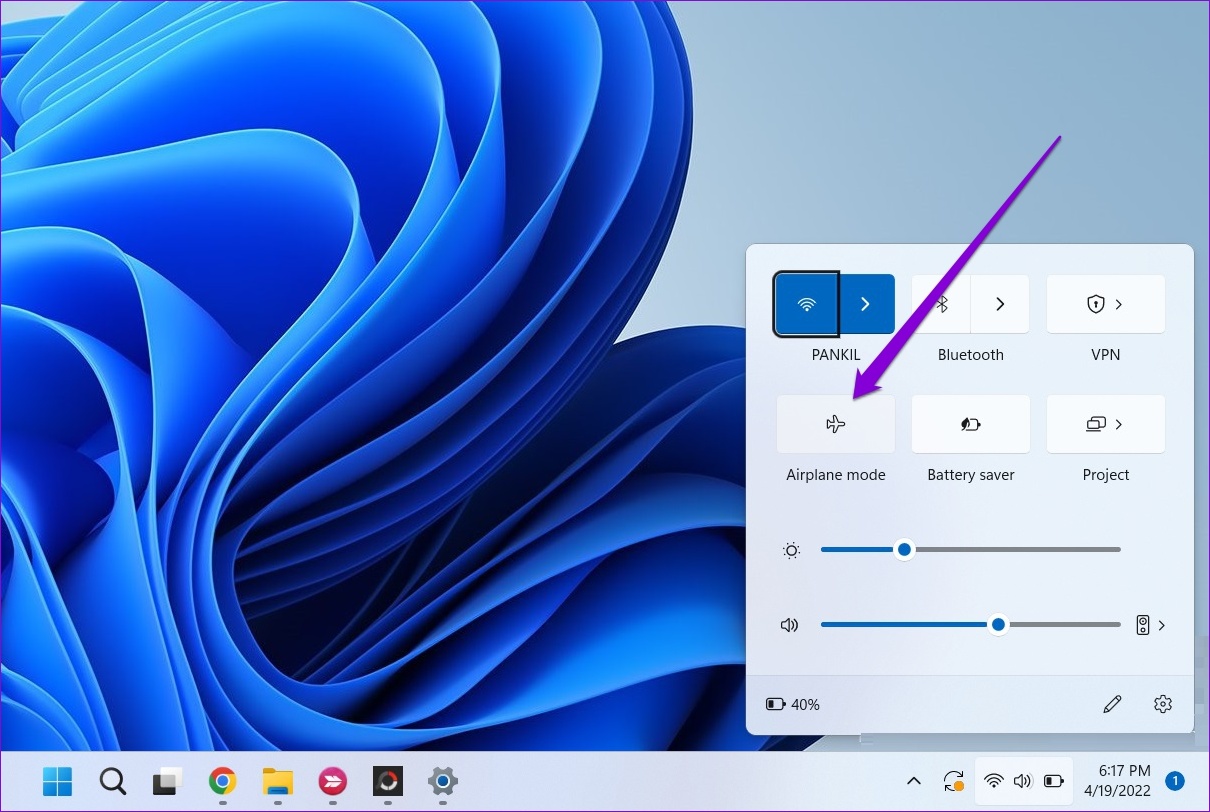
Toggling the Airplane mode is a quick way to refresh all wireless radios on your computer and resolve minor Wi-Fi, Bluetooth, and other connectivity issues. Press the Windows key + A to open the Quick Settings panel and enable the Airplane mode. Wait for a few seconds and turn it off.
Click the arrow next to the Bluetooth icon and select your paired device from the list.
2. Replug the Bluetooth Adapter
Are you using an external Bluetooth adapter on your PC? Try unplugging it and plugging it back in. If that doesn’t help, plug the adapter into a different USB port. This should help verify if there’s an issue with the USB port you’re using.
3. Configure Bluetooth Support Service
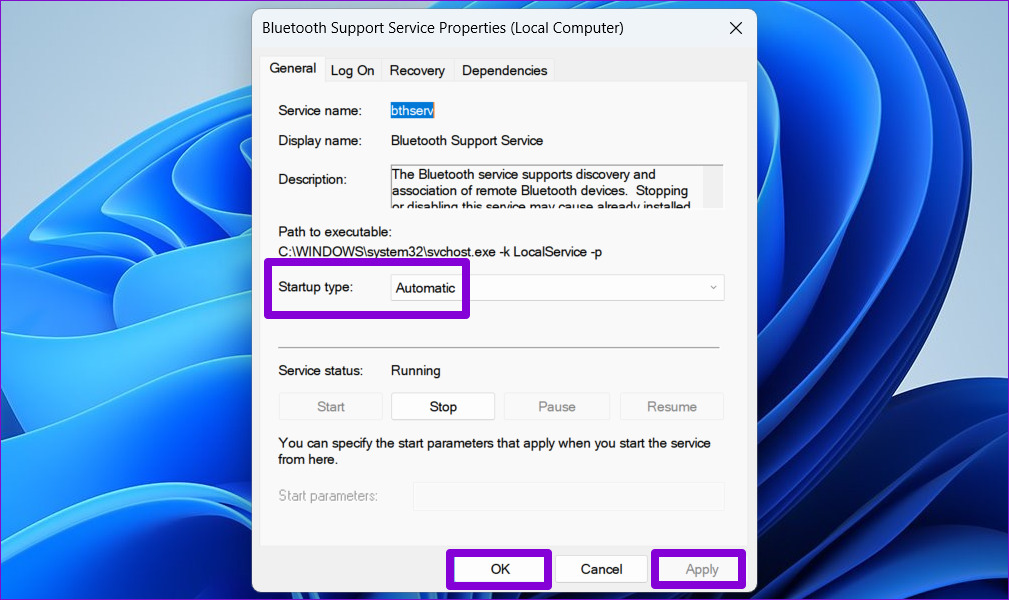
Bluetooth Support Service helps Windows discover and connect to nearby Bluetooth devices. Typically, the service runs automatically every time Windows boots. However, if that isn’t happening, Windows will fail to connect to your paired Bluetooth devices. Here’s what you need to do to fix it. Step 1: Press the Windows key + R to open the Run dialog box. Type services.msc in the box and press Enter.
Step 2: In the Services window, locate and double-click Bluetooth Support Service to open its properties.
Step 3: Use the drop-down menu next to Startup type to select Automatic. Then, hit Apply followed by OK.
Restart your PC to check if Windows can connect to your paired Bluetooth devices.
4. Run the Bluetooth Troubleshooter
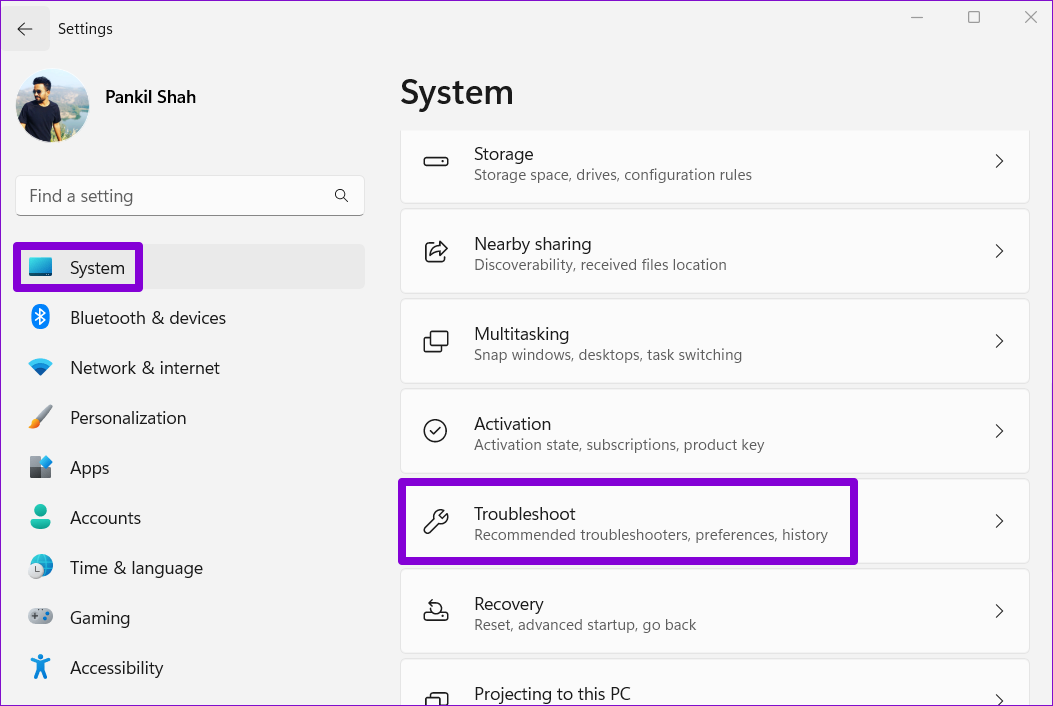
If Windows fails to connect to your devices even after configuring the Bluetooth Support Service, it’s time to run the Bluetooth troubleshooter. It can diagnose your system for Bluetooth connectivity issues and apply appropriate fixes. Here’s how to run it. Step 1: Click on the Start menu icon on the Taskbar and click the gear-shaped icon to launch the Settings app.
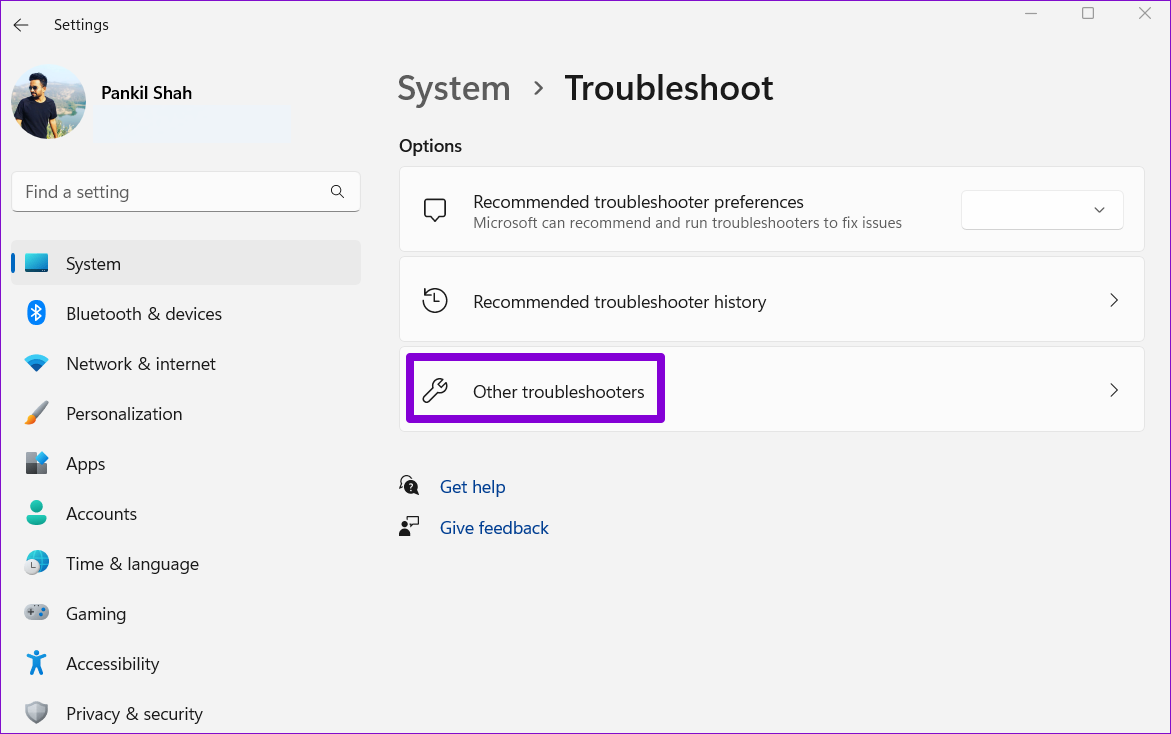
Step 2: In the System tab, scroll down to select Troubleshoot.
Step 3: Click Other troubleshooters.
Step 4: Click the Run button next to Bluetooth.
Allow the troubleshooter to find and fix any problems with your system and try to connect your Bluetooth device.
5. Remove Your Device and Pair It Again
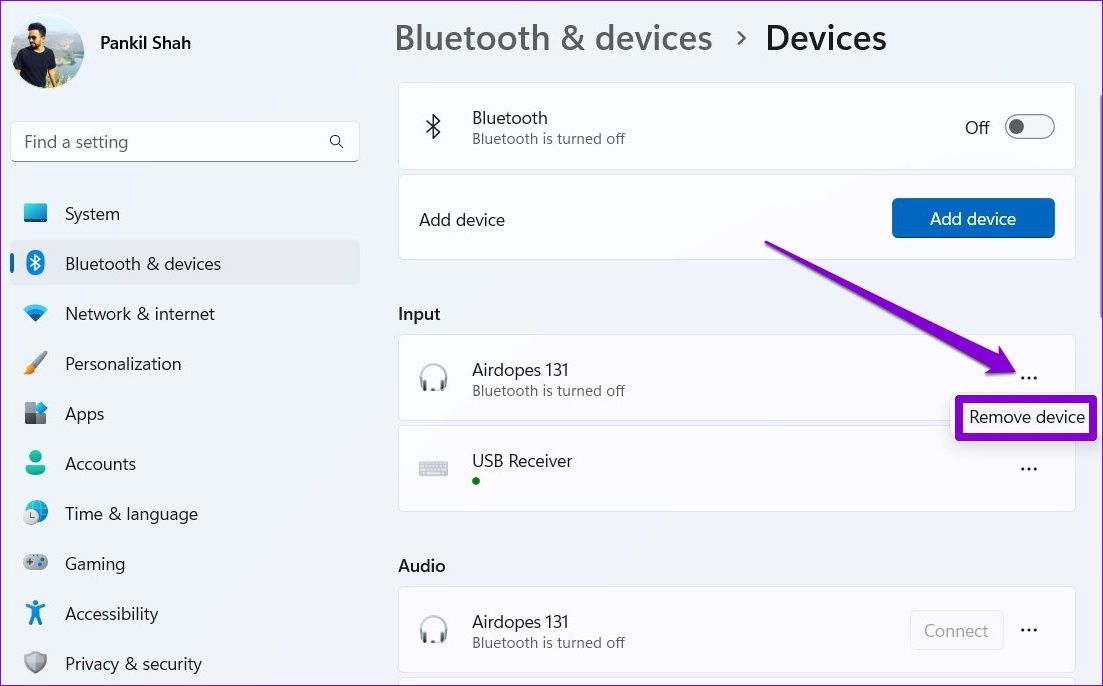
If Windows 11 is only failing to connect to a specific Bluetooth device, that device may have paired incorrectly. Remove the device and pair it again. Step 1: Press the Windows key + I to launch the Settings app. Step 2: Select Bluetooth & devices from the left sidebar. Then, click on Devices.
Step 3: Locate the problematic device on the list. Click the three-dot menu icon next to it and select Remove device.
Step 4: Return to Bluetooth & devices page. Click the Add device button and follow the on-screen prompts to pair your device again.
6. Update or Reinstall Bluetooth Driver
The Bluetooth driver on your computer helps Windows communicate with nearby devices. However, if the driver is outdated, it may not function properly. So, it is best to update your Bluetooth driver to the latest version. Step 1: Press the Windows key + S to open the search menu. Type device manager in the box and select the first result that appears.
Step 2: In the Device Manager window, expand Bluetooth. Right-click on your Bluetooth adapter and select Update driver.
Follow the on-screen instructions to finish updating the driver. If updating the Bluetooth driver doesn’t fix the problem, the driver is most likely damaged. In that case, you’ll have to reinstall the Bluetooth driver on your computer. For that, right-click on the Bluetooth adapter and select Uninstall device. Then, restart your PC, and Windows should install the missing driver during boot.
Go Wireless
Bluetooth is great when it works, but you might encounter connection problems often. Unless there’s a hardware issue, one of the solutions in this guide should get Windows 11 to connect with your paired Bluetooth devices. Let us know which one works for you in the comments below.
