In May 2022, Google introduced two new additions to the smart canvas to enhance collaboration. Using drop-down options and table templates, it’s easier than ever to manage projects and tasks in Google Docs. We will create a project from scratch, add relevant details, and finally invite team members to manage it in this post. Let’s get started.
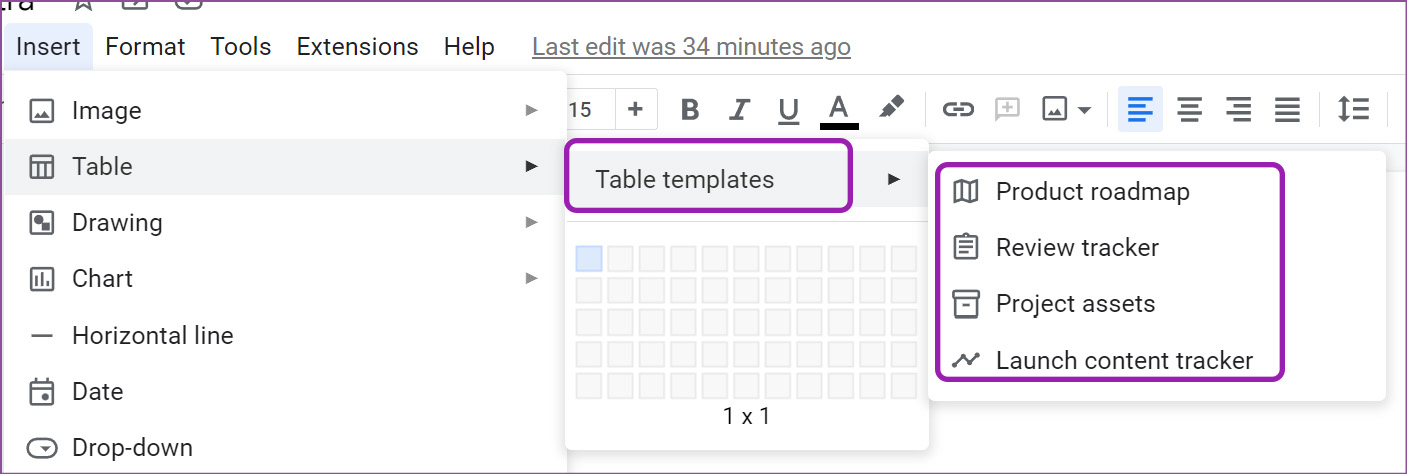
Explore Table Templates
Table templates are various ready-to-use databases based on your preference. Here’s how you can use the correct templates. Step 1: Open Google Chrome or any desktop browser, type docs.new in the address bar and press Enter to open a new Docs document. Step 3: Select Insert at the top and and choose Table option from the drop-down menu.
Step 4: From Tables option, select Table templates and check default project management templates.
You can also type @ and select a relevant template from the drop-down menu. Here, we will use the Product roadmap to get started.
Create a Project Database
Now that you have added a relevant table template in Google Docs, it’s time to customize it based on your preference.
Add, Remove Columns and Rows
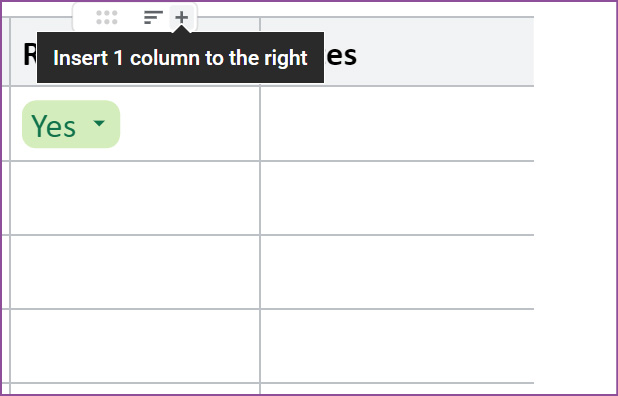
The default Product roadmap template comes with four columns and four rows. This may not be sufficient for everyone. Let’s add some more blocks to the mix. Step 1: To add a column, hover the cursor over the top cell. Step 2: You will see a small floating menu appearing in the screenshot below.
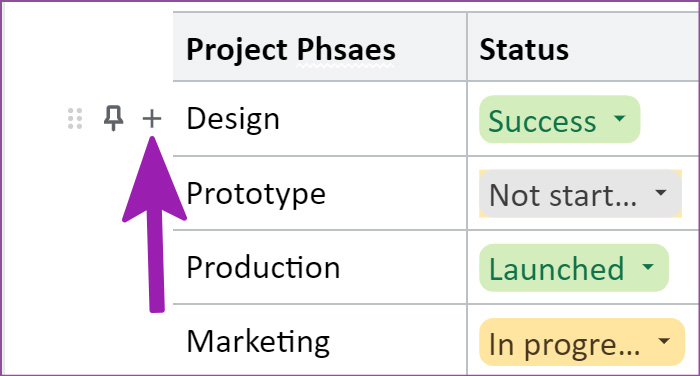
Step 3: Select + icon to insert a column to the right. Similarly, you can move the left side and click on the + icon to add another row. You can drag and drop rows and columns in Google Docs at any point.
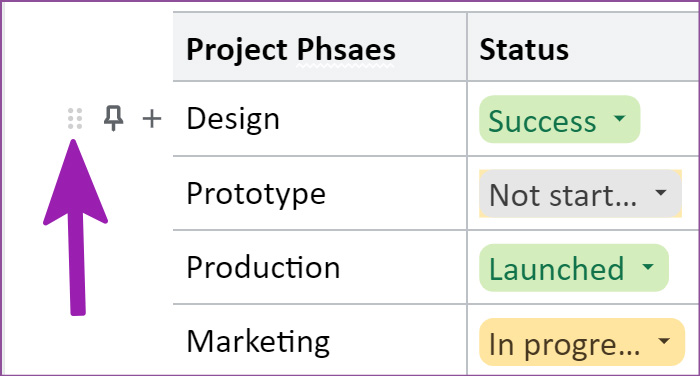
To move a raw, hover the cursor over the first cell, drag and drop using the six-dot menu. You can use the same floating menu (check the screenshot above), click on the six-dot icon, and change the column position.
Use and Customize Drop-down Options
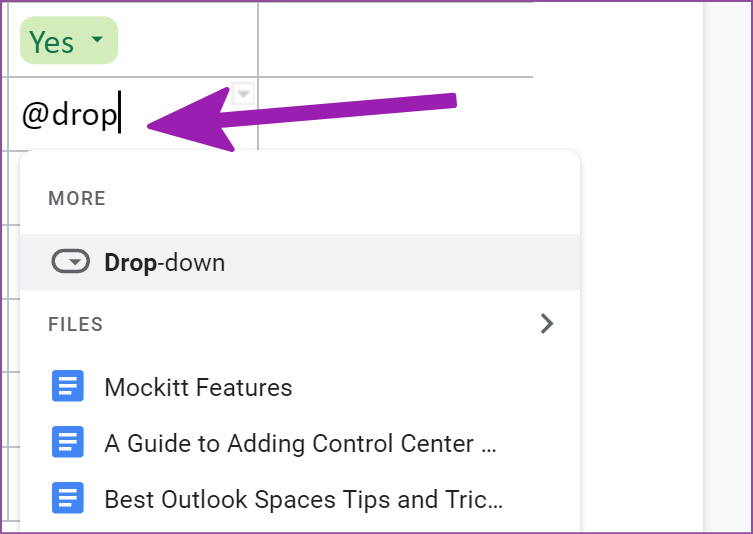
It is officially called drop-down chips; it allows you to look at project status quickly. Here’s how you can add new drop-down options and edit existing ones with color-coding. First, let us show you how to implement them in any cell. Step 1: In your Google Docs document, select a cell where you want to implement the drop-down function. Step 2: Type @drop-down and select the same from the suggestion.
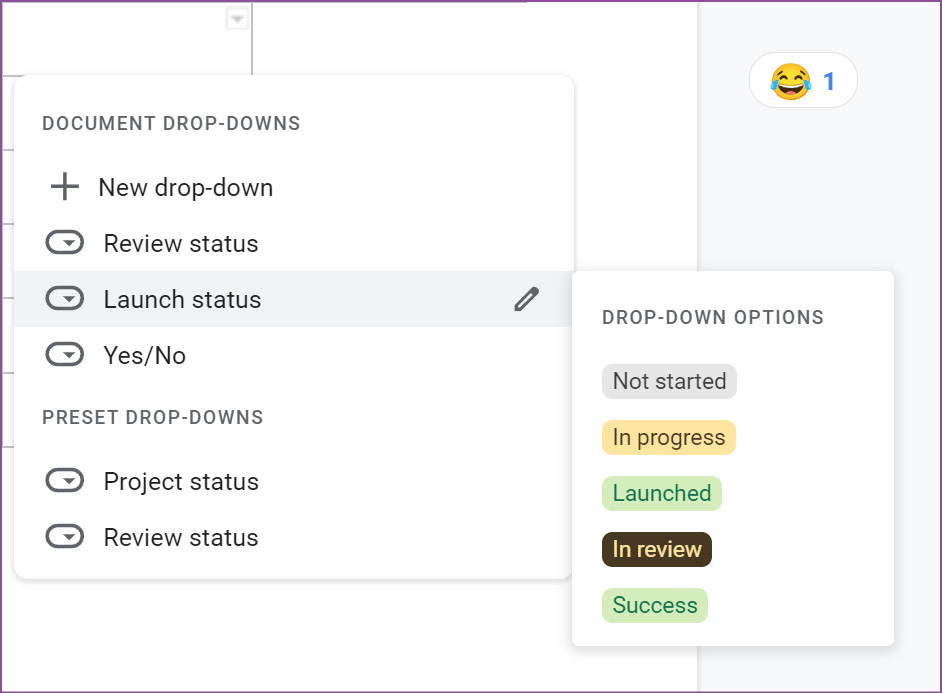
Step 3: You can either create a new drop-down as per your requirements or select from existing ones – Review status, Launch status, Yes/No.
Step 4: Perform the same in all relevant cells. Once you have added a drop-down menu, you may want to customize it with more options.
Customize Drop-down Options
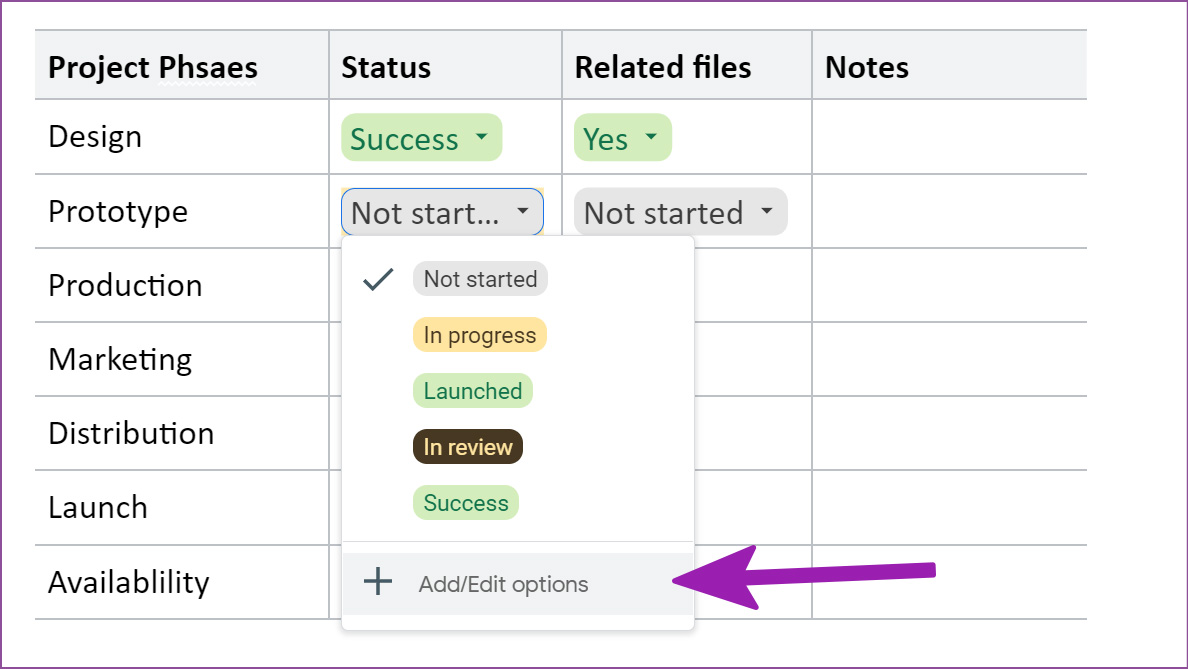
Here’s how you can customize drop-down options and add new status options. Step 1: Click on the down-arrow beside a drop-down menu. Step 2: Select Add/Edit options.
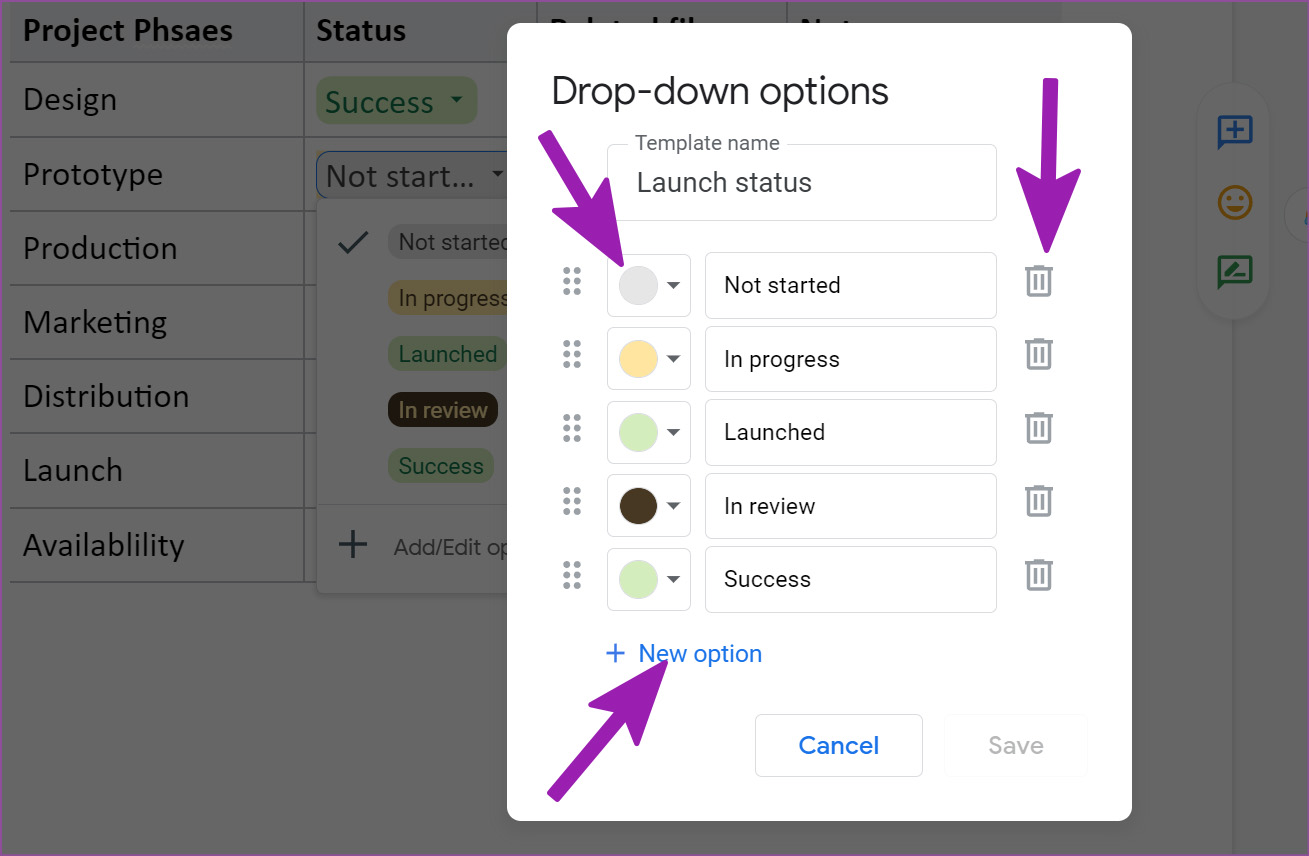
Step 3: You can change the template name, status position and even remove it using the delete icon. Step 4: Click on the New option at the bottom to add a new option and give it a relevant name. Step 5: You can click on the color menu and select the color option.
Step 6: Once you click Save, you have two options to choose from.
Just this instance: The change will apply to the select drop-down menu only. Apply to all: You should use this option. The changes will apply to all the drop-down menu bars with the same properties. You can create as many drop-down menus as you prefer and add them to any column or row in a Google Docs document.
Add Notes and Related Files
Since Google Docs is tightly integrated with Google Drive, you can easily add reference files from Docs, Sheets, and Slides. Step 1: Type the @ symbol in a cell and continue typing the document name. Step 2: Google Docs will show relevant files from your Drive account.
Step 3: Select a file and add it to your database. You can also add notes for your team members to refer to.
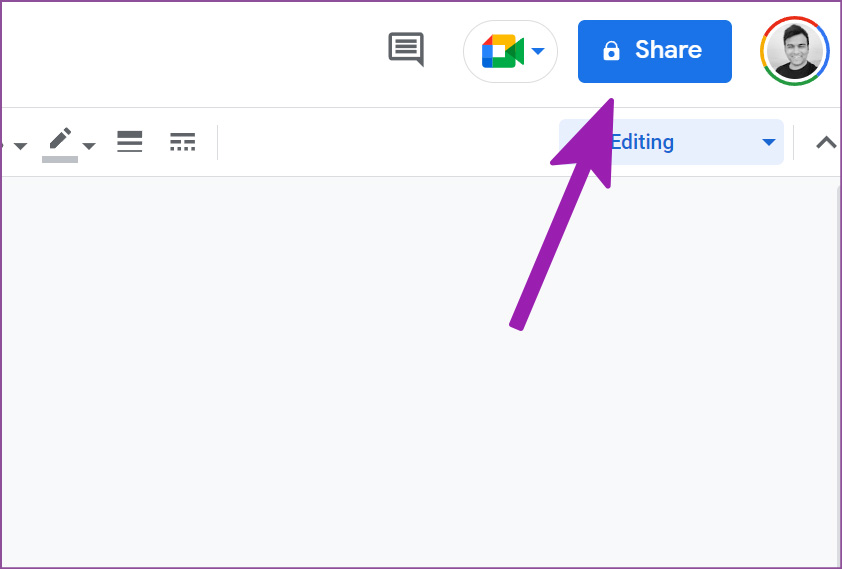
Share Google Docs
Now that you have the perfect Google Docs document with all the relevant project details, you can invite your team members to it. Step 1: Click on the Share button at the top.
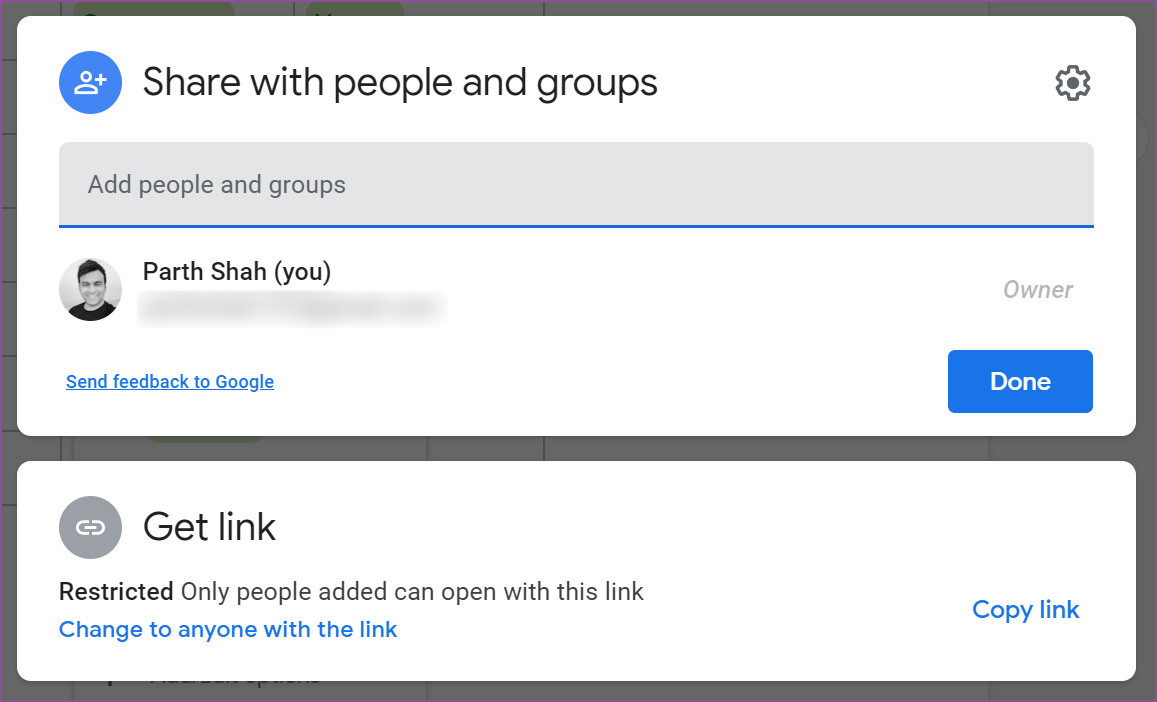
Step 2: Add people’s email IDs, give them the required permission, and hit the Send button.
Master Google Docs
You no longer need to switch between a dedicated project management tool and Google Docs. You can try smart canvas in Docs and replicate the same experience in a single place. Of course, this is no match for advanced tools like Asana, Jira, or AirTable that come with automation and other functions. But it’s still a promising start by Google, and we can’t wait to see how the company improves upon a strong foundation. The above article may contain affiliate links which help support Guiding Tech. However, it does not affect our editorial integrity. The content remains unbiased and authentic.


![]()

