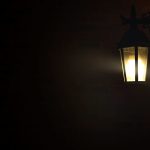
Well, turns out that there’s a photo effect that’s allotted specifically for such photos that are void of sunlight (or artificial light for that mater). It’s called Night Vision effect and the name comes from the night vision goggles that are mainly used by professionals like forest guards or men in the armed forces who need to venture out in the night and can’t afford to not know what’s around them. (image credit – dvidshub) This effect can help you enhance the features and richness of photos taken at night. Though, you may also turn pictures shot in full light to night scale. Our guide is a step by step process to get this effect on your picture using an online tool called Photobucket. This tool has immense potential and ‘Nightvision’ (that’s how they write it) is one effect which really amused me. So, let us see how it works.
Steps to Add Night Vision or Nightvision Effect
First and foremost you will need to register and own an account with Photobucket which you may by following the link. Then, follow the below stated steps:- Step 1: As you log in to your account you will be able to spot a toolbar like interface. Click on Upload to get started (meaning start uploading photos you wish to edit). Step 2: When you upload photos you will be able to add title, a short description and few tags. This isn’t mandatory but then it helps you manage your photos. Step 3: Next, navigate to Albums (as in the toolbar in Step 1) and hit option Edit Photos. This will let you select an image to edit (from your album). Step 4: You are now on the edit interface. Follow to Effects tab and scroll right/left using the More buttons until you find an icon named Nightvision. (Take note of my initial image here). Step 5: Hit this button and your image will look richer in night colors. Off course if you are not satisfied with this, you have Advanced Options. Step 6: As you click for Advanced Options, a small scrolling tool will come up. You may adjust the image’s fade, brightness and contrast. And you may select to apply effects over entire image, selected focus or paint own region. Step 7: When you are satisfied and done you may proceed to save your work (save a copy or replace the original). The image below shows my final work.
Conclusion
Photobucket is a cool tool to edit photos quickly and perfectly. My attempt to Nightvisionize my snap went quite well. Let us know how did it work out for you. Also share about other effects that you like in the comments. And yes, you can store your photos or share them with friends right from your account. Photobucket also has a paid pro version. The above article may contain affiliate links which help support Guiding Tech. However, it does not affect our editorial integrity. The content remains unbiased and authentic.