Whether you want to save energy or reduce wear and tear on your Mac, simply follow the below steps correctly and you will be good to go. Let’s begin with the most common way to schedule a shutdown.
1. Use Built-in Power Scheduler to Schedule Shutdown on Mac
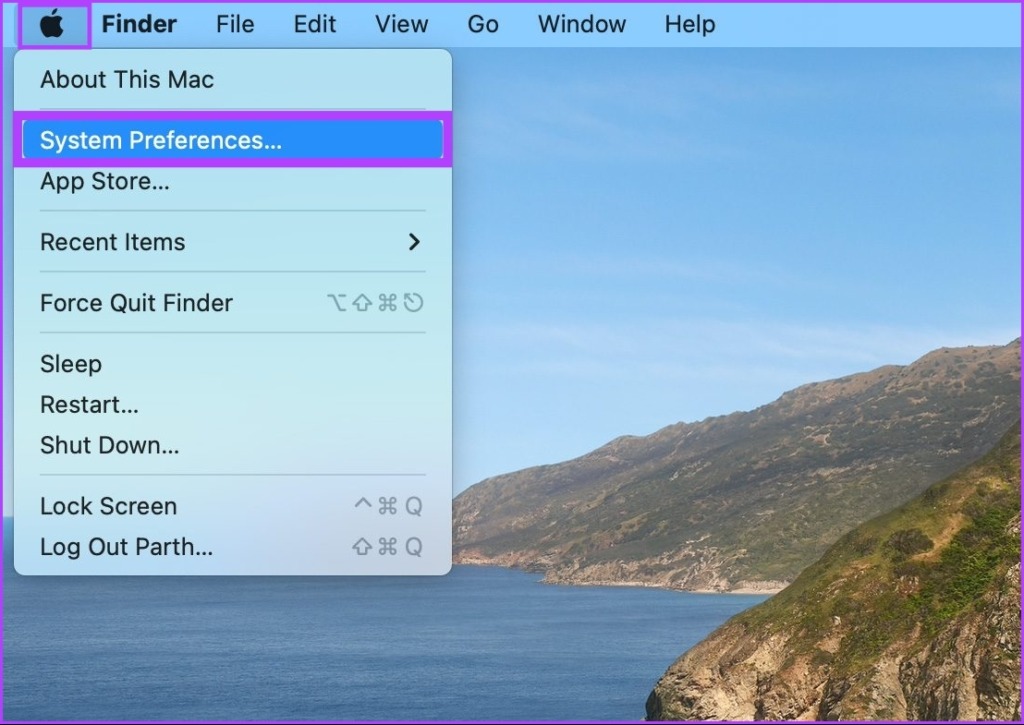
The power scheduling feature was built-in into the Mac, enabling you to set the shutdown timer on Mac at your convenience. However, with macOS Ventura, Apple removed the Energy Saver option from the System Preferences, letting you schedule wake, sleep, startup, and shutdown. So, if you are running Mac on Monterey or earlier, follow the below steps, and if you are running macOS Ventura, move to the next method. Step 1: Click on the Apple logo from your desktop, and from the drop-down menu, select System Preferences. Note: Alternatively, press the ‘Command + Space’ key on your keyboard, type System Preferences, and press the Return key.
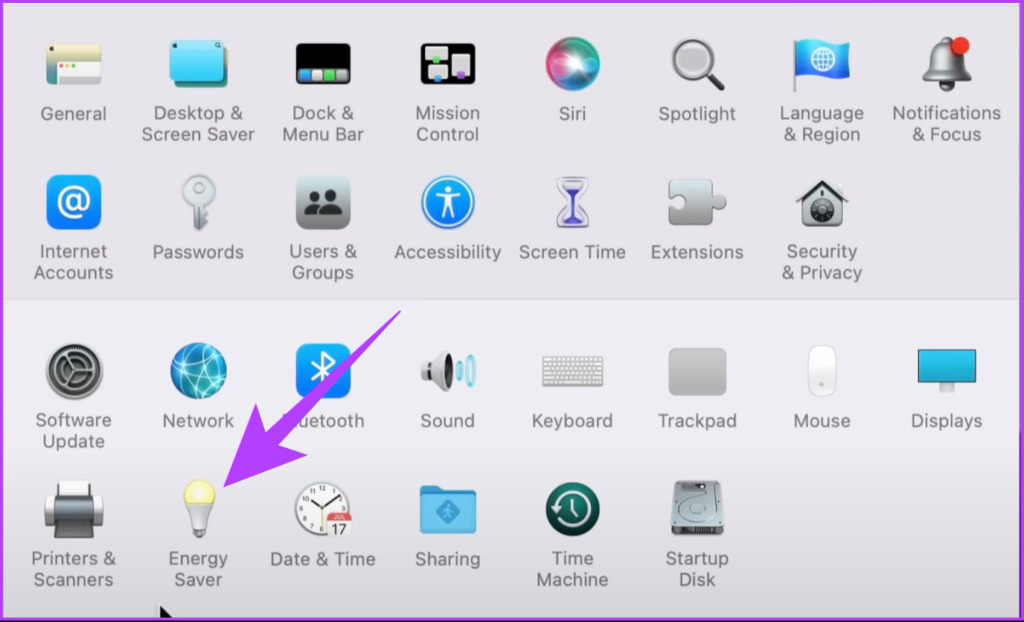
Step 2: Go to Energy Saver.
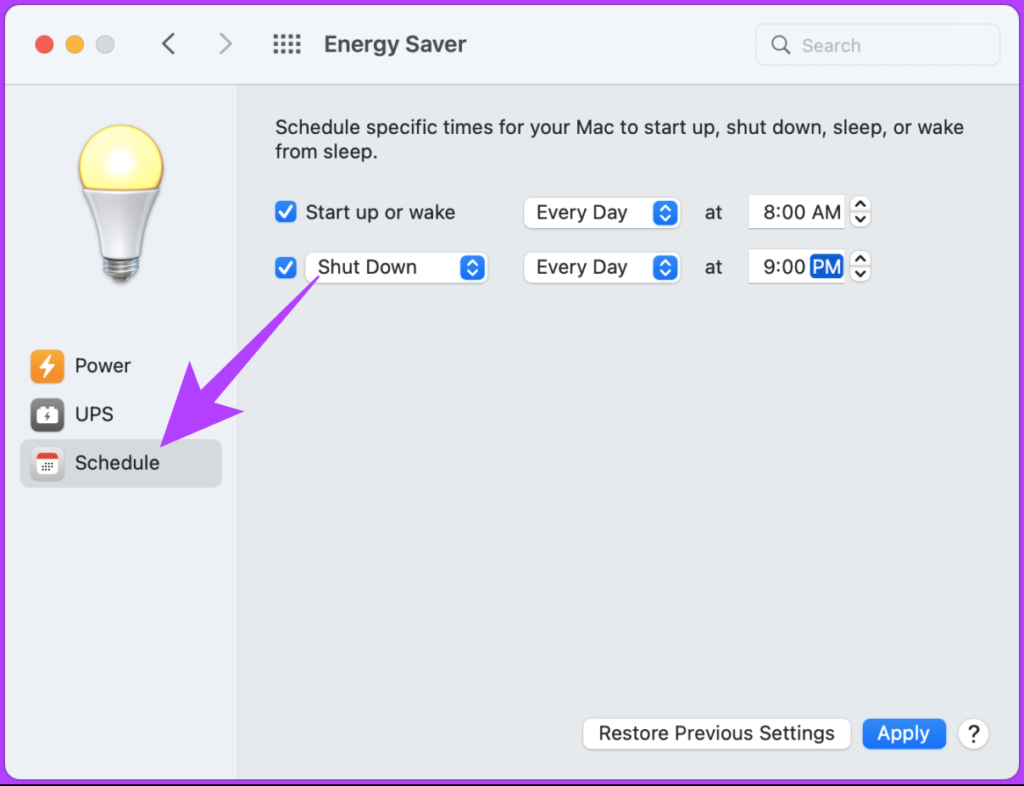
Step 3: Select the Schedule option.
Step 4: Specify the day, time, and action to be executed.
Step 5: Finally, click Apply.
That’s it. You have successfully scheduled your Mac to shut down at a specified time. If you feel that the steps are too long to follow, there are some handy applications such as Timer Clock (paid) and Almighty- Powerful tweaks (freemium) that get the job done relatively easily. That said if you are on macOS Ventura or want to execute the same without touching the Energy Saver option, move to the next method.
2. Schedule Shutdown Timer on Mac Using Terminal
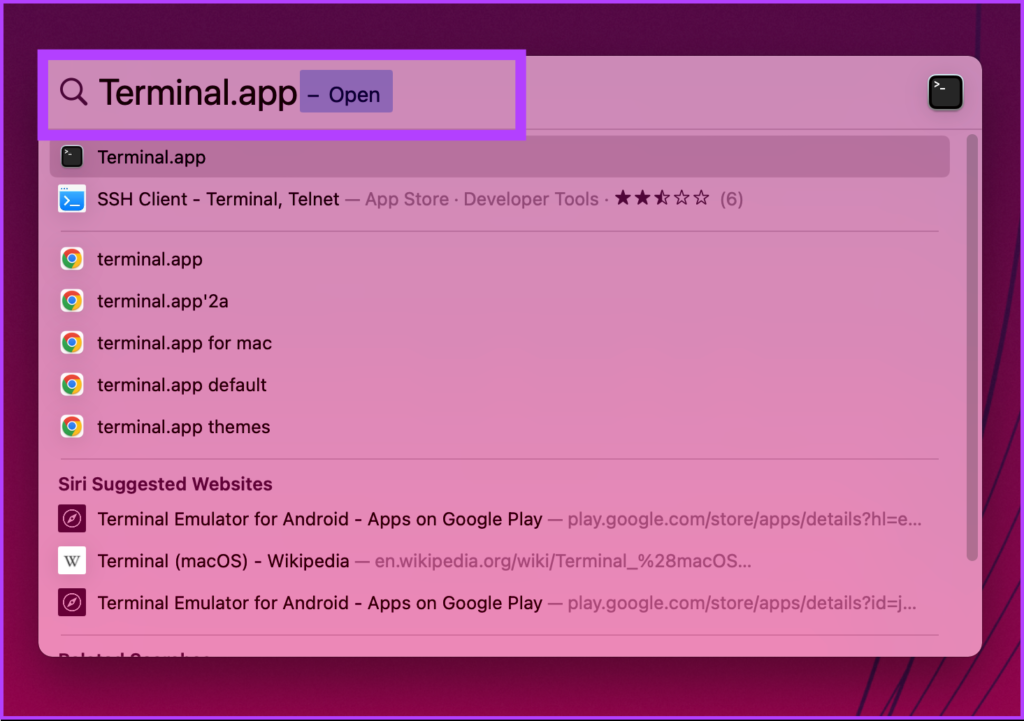
Step 1: Press the ‘Command + Space’ key on your keyboard, type Terminal, and press the Return key. Note: You can open Terminal in various ways, such as from LaunchPad, the Applications folder, etc.
Step 2: Type the below command and press Return. Note: ‘-h’ lets you set a timer, while ‘+30’ is the number of minutes after which your Mac will shut down. You can add any number of hours, but make sure you convert it to minutes.
Step 3: Enter your user password for authentication and press Return. Note: When you type your password it won’t be displayed.
There you have it. Terminal will acknowledge and set your shutdown timer if you have done everything right.
It will also assign the process with a process ID (PID) number. Note the ID number as it will be useful when disabling the shutdown timer. If the steps are too complicated for you, there are third-party apps that will ease up the process. Keep reading.
3. How to Create a Desktop Shortcut for the Shutdown Timer on Mac
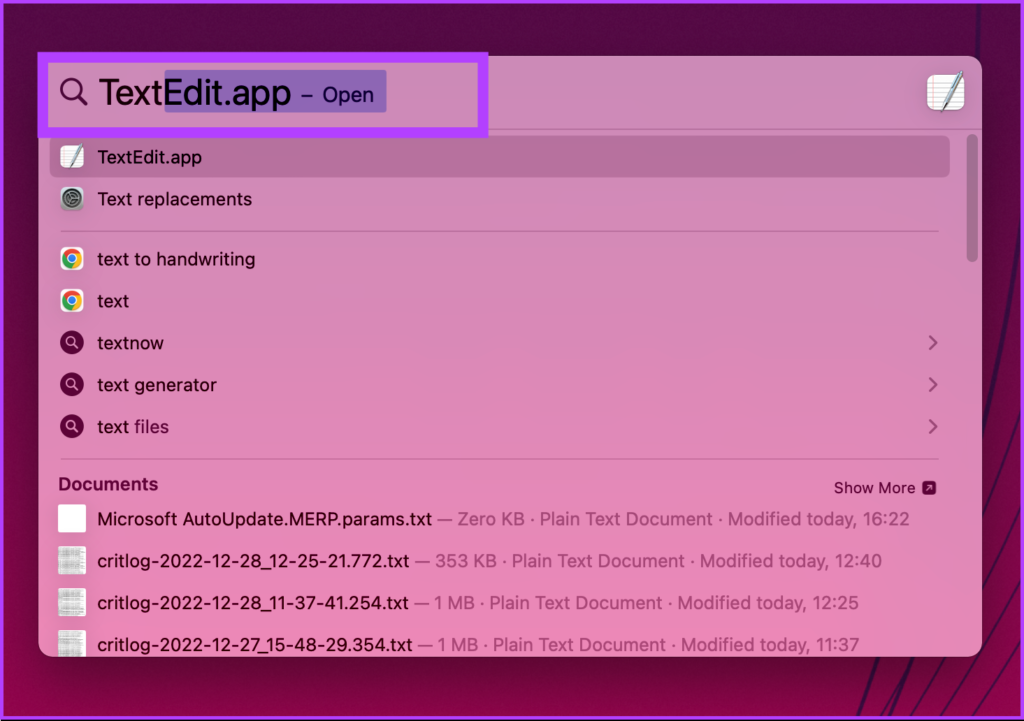
Setting a desktop shortcut for shutting down your Mac is a one-time process, which is straightforward. Follow the instructions below. Step 1: Press the ‘Command + Space’ key on your keyboard, type TextEdit, and press the Return key.
Step 2: Click on New Document.
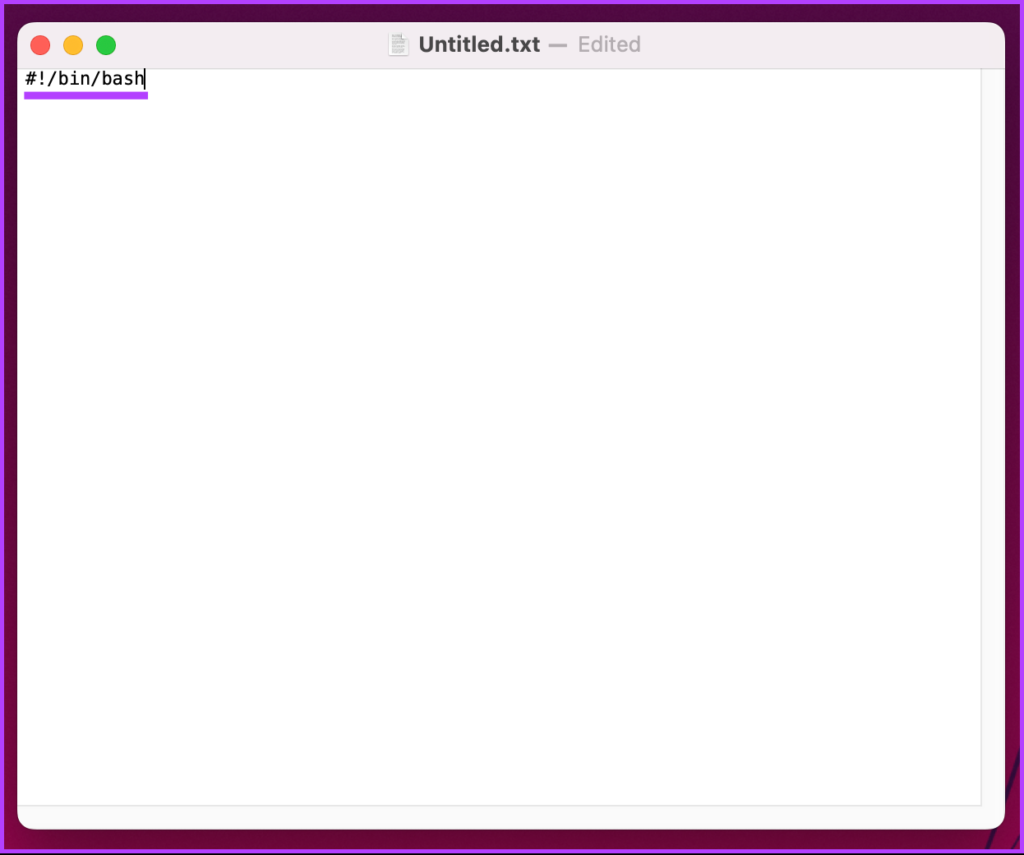
It will open a blank text document into view. Step 3: Press ‘Command+Shift+T’ to access the plaintext field.
Step 4: Type the below command and press the Return key twice.
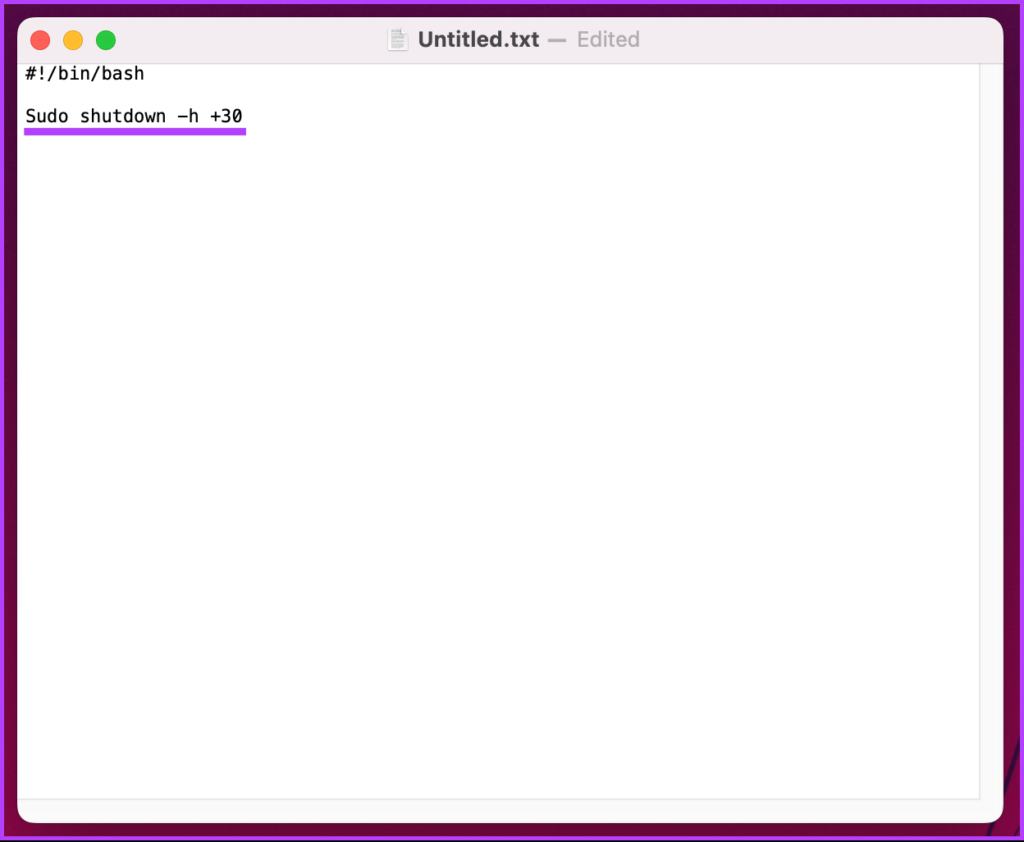
Step 5: Type the below command. Note: ‘-h’ lets you set a timer, while ‘+30’ is the number of minutes after which your Mac will shut down. You can add any number of hours, but make sure you convert it to minutes.
Step 6: Finally, press ‘Command+S’ to save the file with a simple name and destination (preferred Desktop). Uncheck the ‘If no extension is provided, use .”txt”.’ options and click on Save.
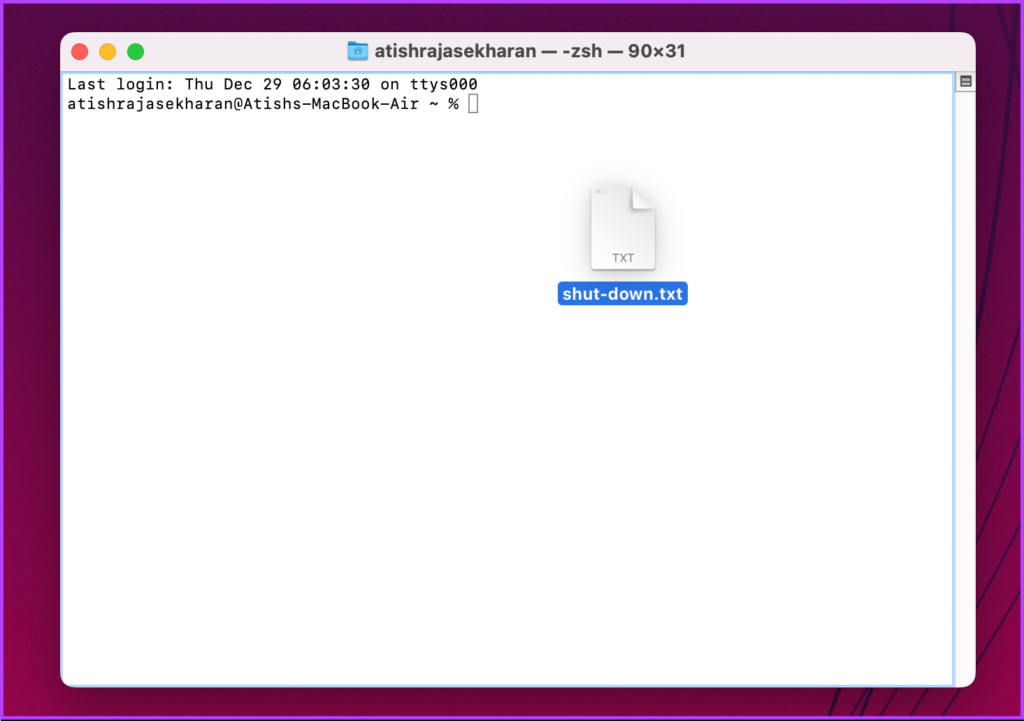
Now, to make the file executable, continue following the steps below. Step 7: Press the ‘Command + Space’ key on your keyboard, type Terminal, and press the Return key.
Step 8: Drag and drop the .txt file you created onto the Terminal and press Return.
Step 9: Enter your user password and press Return. Note: When you type your password, it won’t be displayed.
After which, the shutdown timer will begin, and your Mac will shut down after the set time.
Now that you know how to enable a shutdown timer, it is equally important to know how to disable it. Continue reading.
How to Disable a Shutdown Timer on Mac
Turning off the shutdown timer is easy and only involves a few steps. All you have to do is kill the Process ID (PID). Follow the steps below. Step 1: Press the ‘Command + Space’ key on your keyboard, type Terminal, and press the Return key.
Step 2: Type the below command and press Return. Note: If you don’t remember the PID number, type sudo killall shutdown. It will disable all the active shutdown timers on your Mac.
Step 3: Enter your user password and press Return. Note: When you type your password, it won’t be displayed.
Schedule Shutdowns
Whether you want to set up a daily shutdown timer or a one-time event, the methods mentioned in this article will help you do it. We hope this article helps and assists you with the information you need to schedule a shutdown timer on Mac.