That said, Gmail does not provide a filter for unread emails. So it’s hard to identify where the unread emails sit. To filter the unread emails in your Gmail, here are the best ways you can go about it.
Using a Query in the Search Field
Like Google Search, there are various tips and tricks to use Gmail Search better to get the desired results. One such trick allows you to search for your unread emails easily. Here’s how to do so: Step 1: Open the Gmail page in a web browser and sign in with your account details. Login to Gmail Step 2: Click on the Search box at the top of Gmail.
Step 3: Type the following query into the search bar and hit Enter on your keyboard to show all your unread emails. Step 4: (Optional) To only view the unread emails in your Primary Inbox, type the following query.
Updating Your Gmail Setting
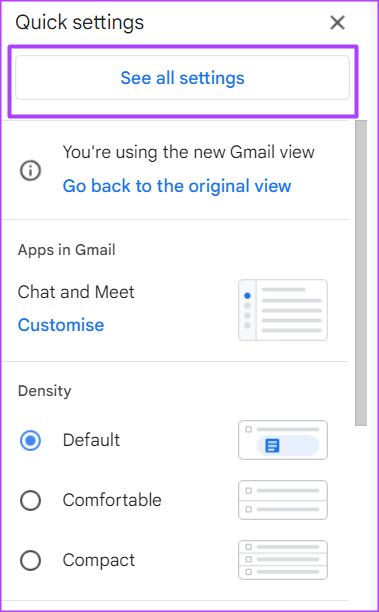
By default, Gmail arranges your emails in the order you receive them. So, the most recent emails appear first while the older ones are further down. However, you can change this setting to showcase your unread emails first while the other emails are at the bottom. Here’s how to do so: Step 1: Open the Gmail page in a web browser and sign in with your account details. Login to Gmail Step 2: At the top right of your Gmail, click on the Settings icon represented by a gear.
Step 3: Click on ‘See all settings.’
Step 4: On the Ribbon, click on the Inbox tab.
Step 5: Click on the drop-down beside Inbox type.
Step 6: From the drop-down options, click Unread first.
Step 7: In the Inbox sections field, click on the drop-down beside Unread.
Step 8: Select between 5 and 50 for the number of unread items you would like to see in your Inbox.
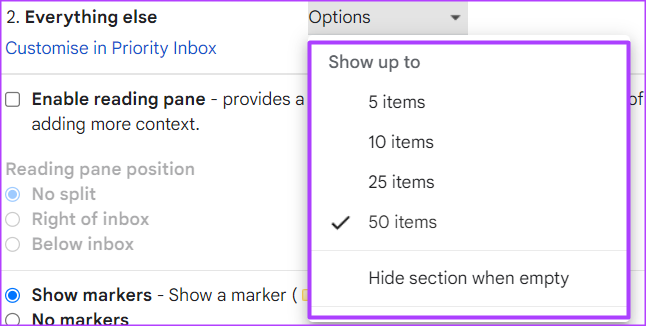
Step 9: In the Inbox sections field, click on the drop-down beside Everything else.
Step 10: Select between 5 and 50 for the number of everything else you would like to see in your Inbox.
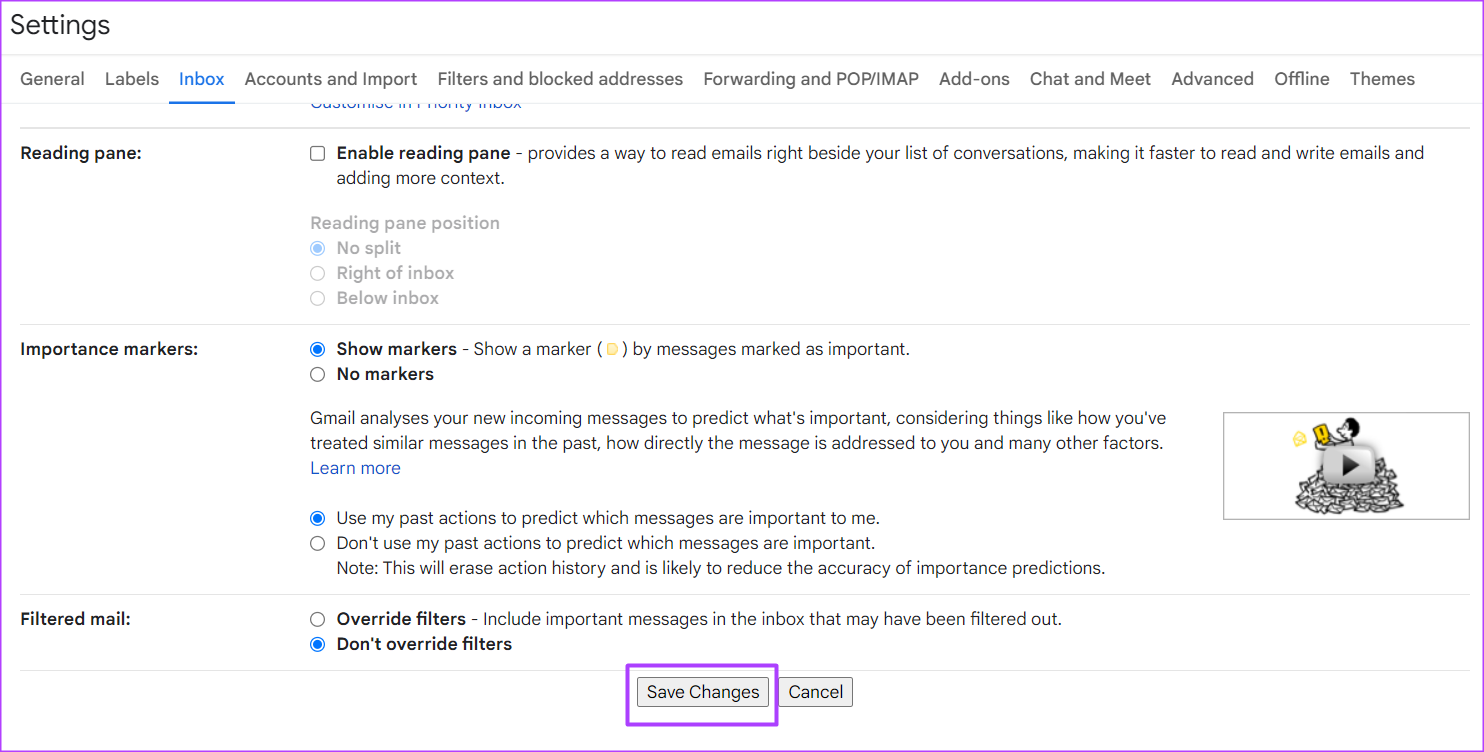
Step 11: Scroll down to the bottom of the page and click Save Changes to enable your new setting.
By following the steps above, the emails in your Gmail Inbox will be split into Unread and Everything Else.
Creating a Label
Labels are one of the best ways to organize your Gmail Inbox. Using Labets, you can sort out your emails into different categories. Here’s how to create a label for your unread emails in Gmail. Step 1: Open the Gmail page in a web browser and sign in with your account details. Login to Gmail Step 2: Click on the Search box at the top of Gmail.
Step 3: Type the following query into the search bar and hit Enter on your keyboard to show all your unread emails. Step 4: Click on the ‘Show search options’ filter at the end of the search bar.
Step 5: Click Create filter.
Step 6: Tick the box beside ‘Apply the label.’
Step 7: Click the drop-down beside Apply the label and select New label from the options.
Step 8: In the New label dialog box, enter a name for your new label.
Step 9: Click Create to save your new label name and create your new label.
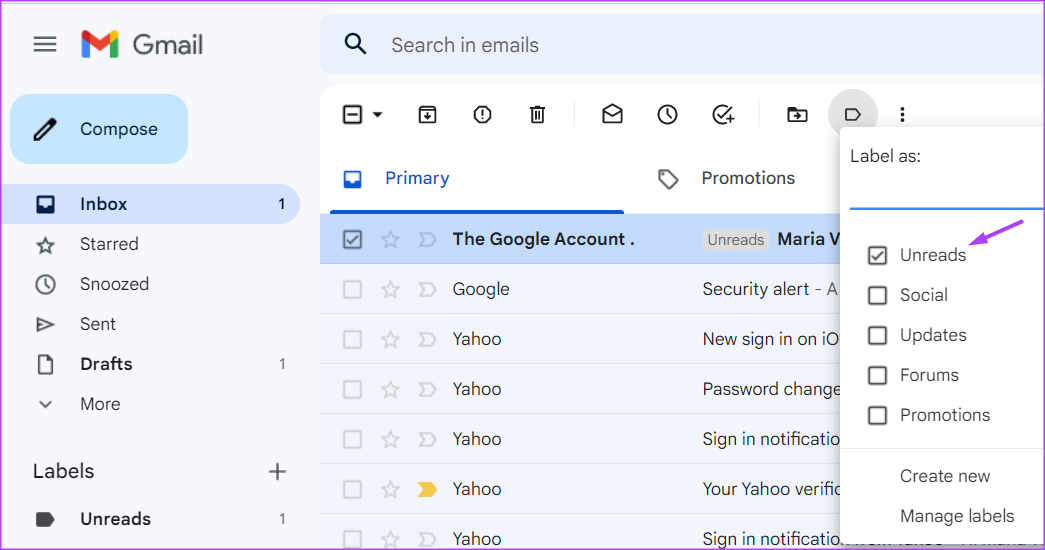
Step 10: On your Inbox, tick any Unread email.
Step 11: Click the Label icon at the top of the page.
Step 12: Tick the box beside the new label created to ensure your Unread emails land there.
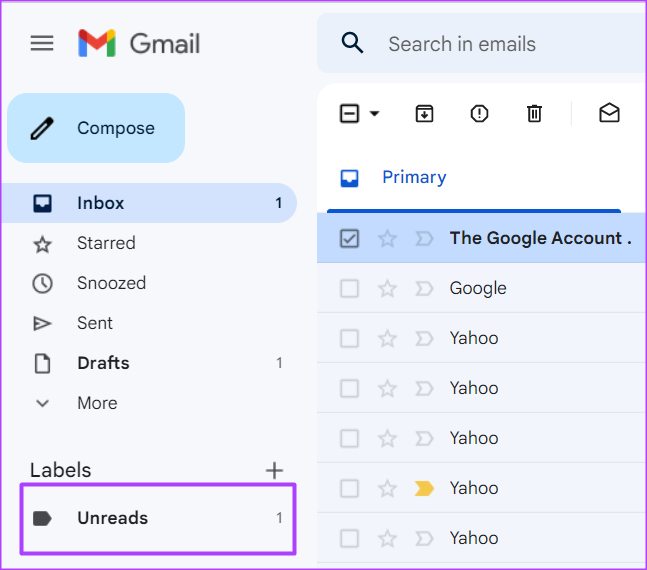
Step 13: To view your Unread emails, click on the label name at the left of your Gmail window.
Using Stars to Organize Your Gmail
Apart from using Labels to organize your Gmail, you can also make use of the Star feature. Stars give a special status to your emails, making them easier to find. This is a good option when you would like to revisit an email. The above article may contain affiliate links which help support Guiding Tech. However, it does not affect our editorial integrity. The content remains unbiased and authentic.
